Lesson14 LCDディスプレイ
英数字のLCDディスプレイを使用する方法を学習します。ディスプレイのにはLEDバックライトがあり、各行に最大16文字の2行を表示できます。ディスプレイ上の各文字の長方形と各文字を構成するピクセルが薄すらと見ることができます。ディスプレイは青色で白い文字のみ表示することができます。
ここからLesson内容は、連続して使っていくようになっていきます。
リンク
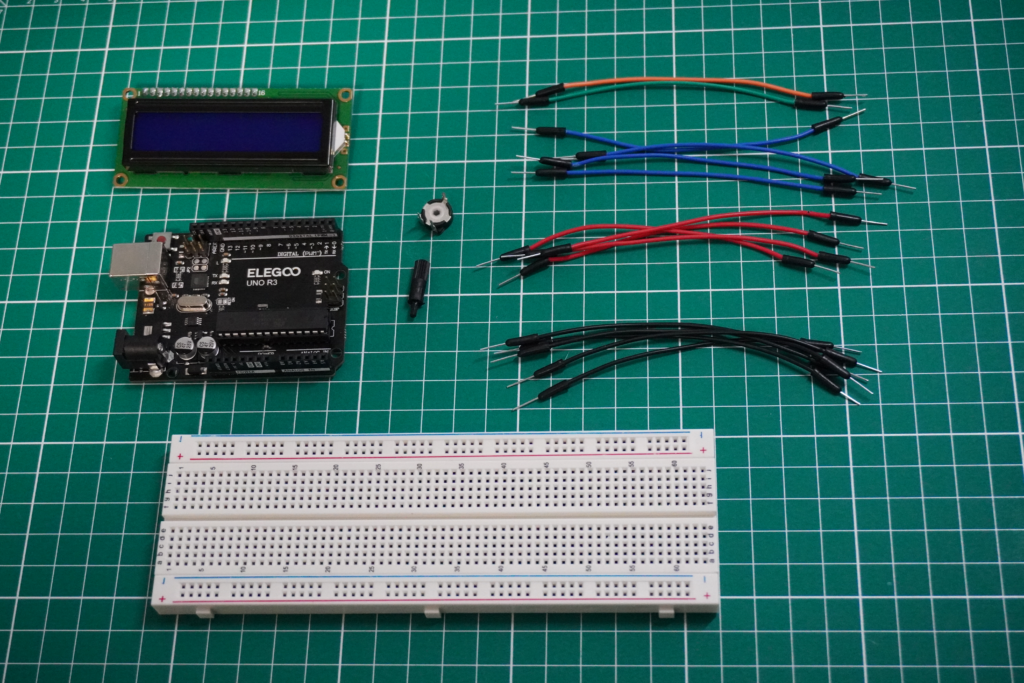
使用部品
必要な部品は以下になります。
- Elegoo UNO R3 x 1
- LCD1602 Module x 1
- Potentiometer(10k) x 1
- 830 tie-points Breadboard x 1
- M-M Jumper wires x 16
LCD1602 (ディスプレイ)とPotentiomater
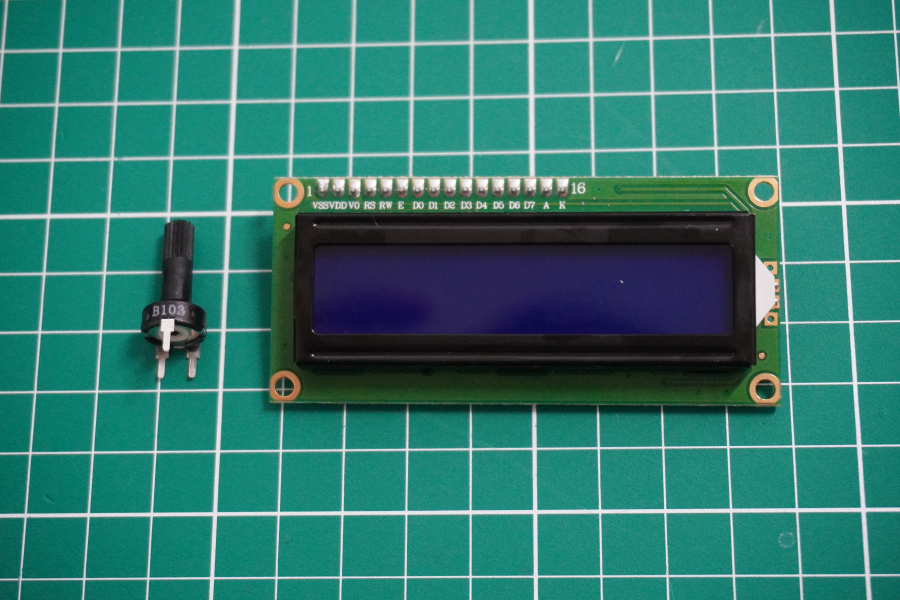
LCD1602の各ピンを説明します。
| LCDのピン | 説明 |
| VSS | グランドに接続するピン |
| VDD | 5Vに接続するピン |
| VO | LCD1602のコントラクトを調整するピン |
| RS | LCDのメモリ内のどこにデータを書き込むかを制御するレジスタピン。 画面に表示されている内容を保持するデータレジスタ、 または命令レジスタ(LCDのコントローラが次に何をするのかの指示を 参照する)を選択できます。 |
| R/W | 読み出しモードまたは書き込みモードを選択するピン |
| E | ローレベルのエネルギーが供給されると、LCDモジュールに関連する 命令を実行させるピン |
| D0-D7 | データを読み書きするためのピン |
| A and K | LEDバックライトを制御するピン |
Potentiomaterとは、可変抵抗器の事でつまみをつかんで回すと抵抗値が変わります。VOピンに流れる電流を増減させることでコントラストを調整します。
回路をつくってみる
それでは実際に回路をつないでみます。
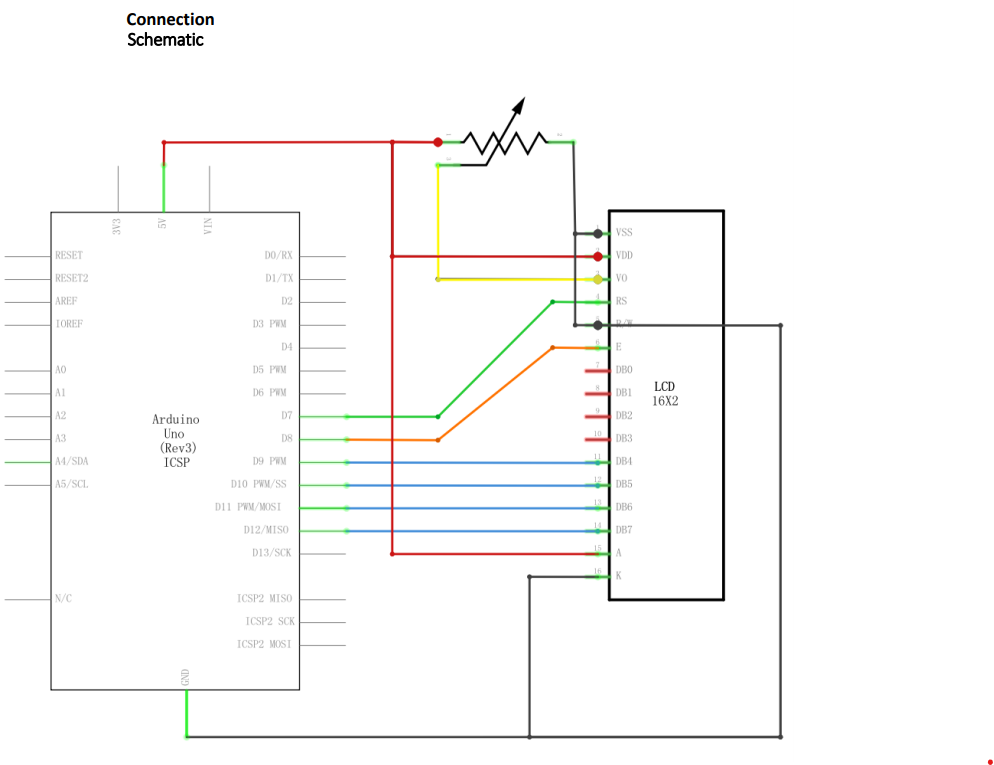
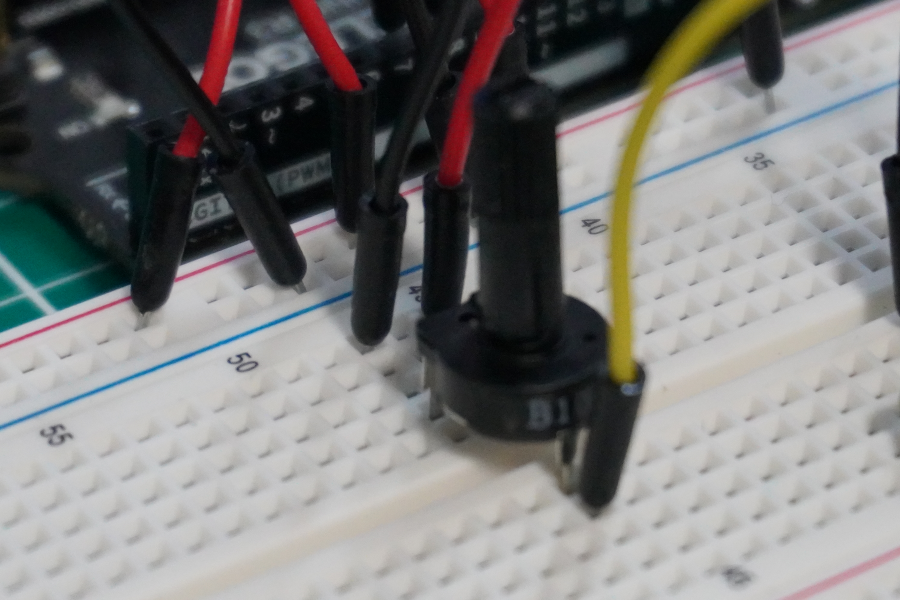
今回は、少し複雑です。まず、ポテンショメータ(可変抵抗器)からですが、インプット側(2ピンの方)は、片方に5V、片方にGNDを繋ぎます。
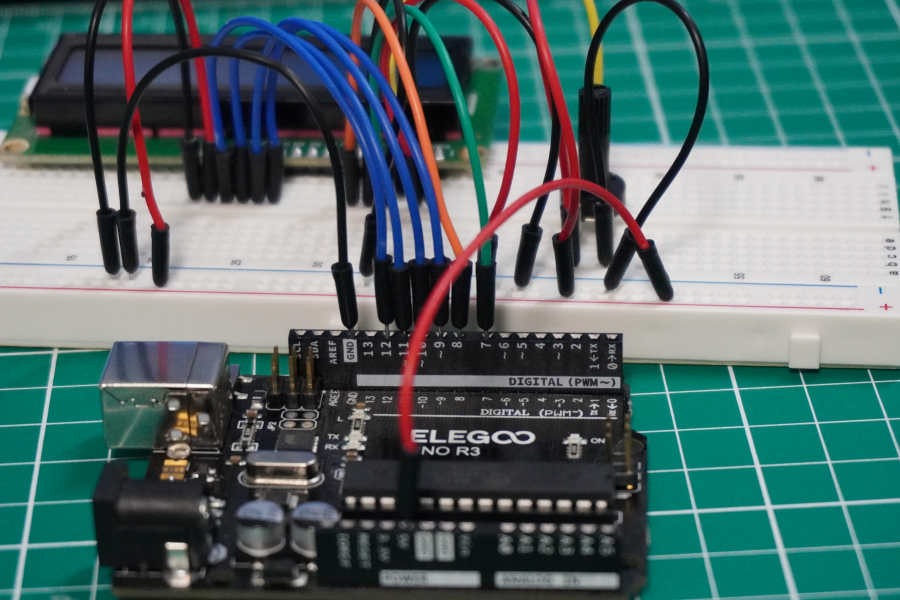
LCDの方は、VSSにGND、VDDに5V、VOにポテンショメータのアウトプット、RSにArduinoのD7、R/WにGND、EにArduinoのD8、D4~D7にそれぞれArduinoのD9~D12、Aに5V、KにGNDを繋ぎます。
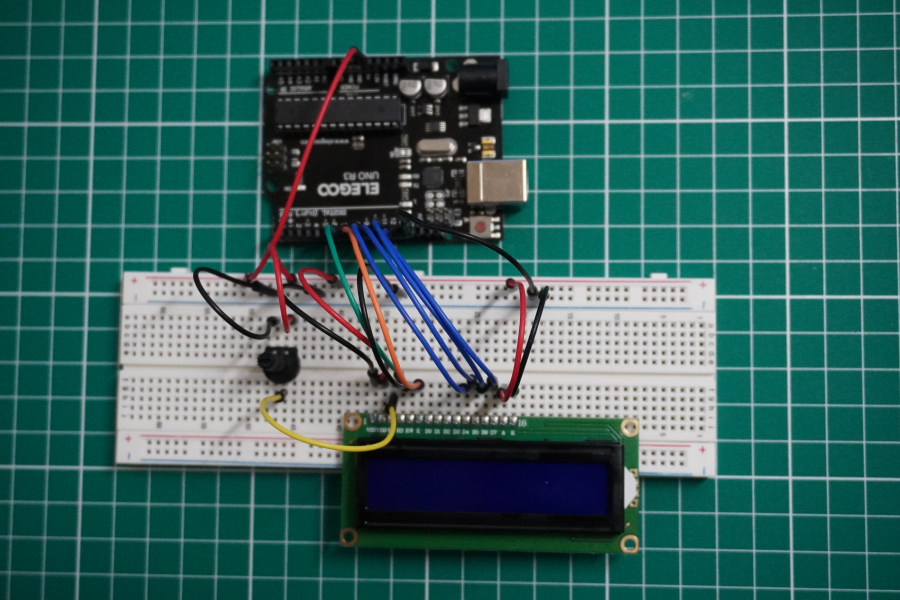
プログラムを動かしてみる
チュートリアルに付属のコードを利用して実際に動かしてみます。

//www.elegoo.com
//2016.12.9
/*
LiquidCrystal Library - Hello World
Demonstrates the use a 16x2 LCD display. The LiquidCrystal
library works with all LCD displays that are compatible with the
Hitachi HD44780 driver. There are many of them out there, and you
can usually tell them by the 16-pin interface.
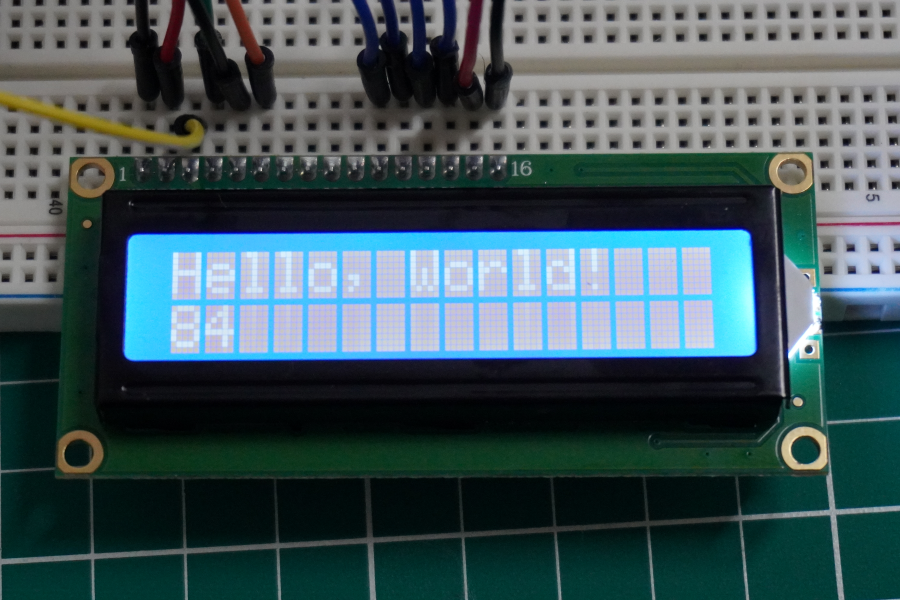
This sketch prints "Hello World!" to the LCD
and shows the time.
The circuit:
* LCD RS pin to digital pin 7
* LCD Enable pin to digital pin 8
* LCD D4 pin to digital pin 9
* LCD D5 pin to digital pin 10
* LCD D6 pin to digital pin 11
* LCD D7 pin to digital pin 12
* LCD R/W pin to ground
* LCD VSS pin to ground
* LCD VCC pin to 5V
* 10K resistor:
* ends to +5V and ground
* wiper to LCD VO pin (pin 3)
Library originally added 18 Apr 2008
by David A. Mellis
library modified 5 Jul 2009
by Limor Fried (http://www.ladyada.net)
example added 9 Jul 2009
by Tom Igoe
modified 22 Nov 2010
by Tom Igoe
This example code is in the public domain.
http://www.arduino.cc/en/Tutorial/LiquidCrystal
*/
// include the library code:
#include <LiquidCrystal.h>
// initialize the library with the numbers of the interface pins
LiquidCrystal lcd(7, 8, 9, 10, 11, 12);
void setup() {
// set up the LCD's number of columns and rows:
lcd.begin(16, 2);
// Print a message to the LCD.
lcd.print("Hello, World!");
}
void loop() {
// set the cursor to column 0, line 1
// (note: line 1 is the second row, since counting begins with 0):
lcd.setCursor(0, 1);
// print the number of seconds since reset:
lcd.print(millis() / 1000);
}
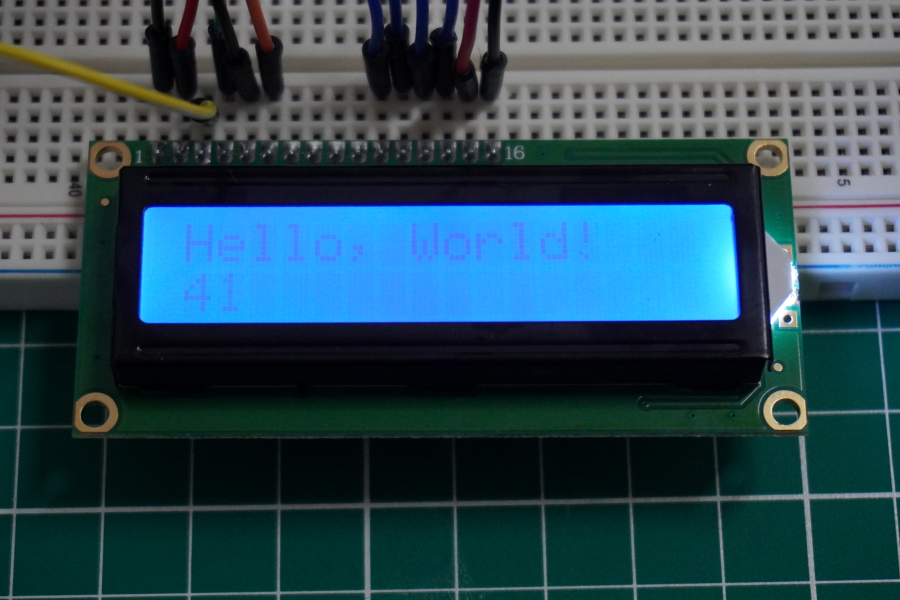
実際に動かしてみます。
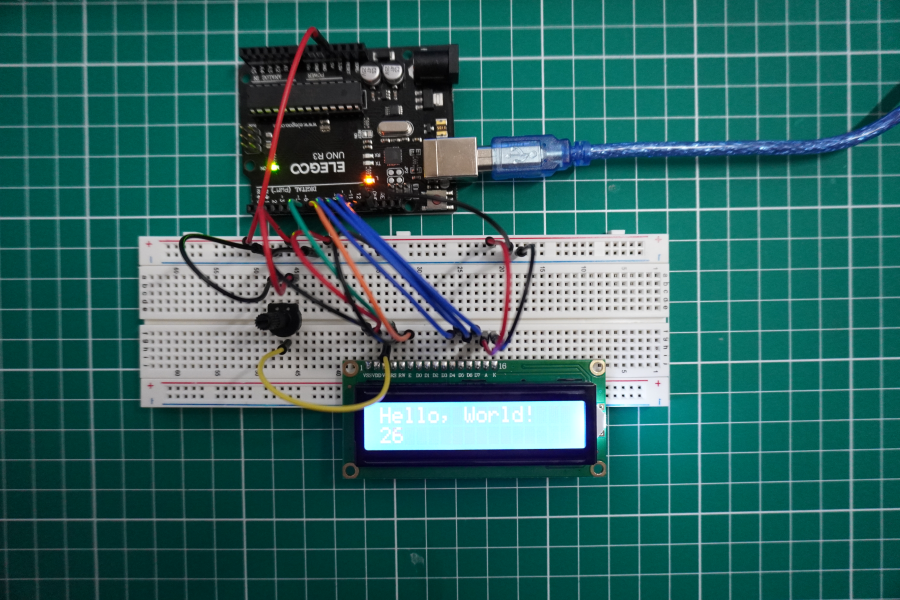
ポテンショメータのつまみを回して明るさを調整してみたいと思います。

以上
コメント