Lesson09 サーボ
サーボは180度(サーボの仕様で変わる)回転することができるギアモータの1種です。Arduino UNO R3から電気パルスを送信することによって制御されます。電気パルスの周波数によりサーボがどの位置に移動すべきかを指示します。
私のArduino学習の目的の1つは、サーボモータの制御です。(なのでこのレッスンはワクワクです)
リンク
必要な部品
必要な部品は以下になります。
- Elegoo Uno R3 x 1
- Servo (SG90) x 1
- M-M Jumper Wire x 3

サーボモータ SG90
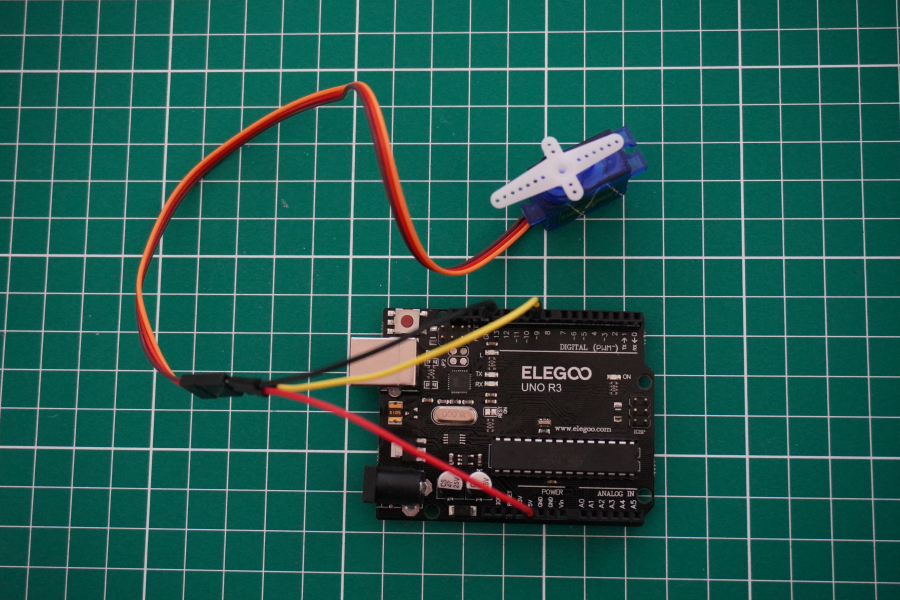
サーボモータには、3本のワイヤーがあり、茶色のワイヤーはGND、赤色のワイヤーは電源ワイヤーで5Vに接続、オレンジ色のワイヤーは信号ワイヤーでPWMに接続する必要があります。

回路を作ってみる
それでは実際に回路を繋いでみます。


GNDと黒ワイヤー、5Vと赤ワイヤー、D9とオレンジワイヤーを繋ぎます。
プログラムを動かしてみる
チュートリアルに付属しているコードを使って実際に動かしてみます。

#include <Servo.h>

//www.elegoo.com
//2016.12.08
#include <Servo.h>

Servo myservo;  // create servo object to control a servo
// twelve servo objects can be created on most boards

int pos = 0;    // variable to store the servo position

void setup() {
  Serial.begin(9600);
  myservo.attach(9);  // attaches the servo on pin 9 to the servo object
}

void loop() {
  for (pos = 0; pos <= 180; pos += 1) { // goes from 0 degrees to 180 degrees
    // in steps of 1 degree
    myservo.write(pos);              // tell servo to go to position in variable 'pos'
    delay(15);                       // waits 15ms for the servo to reach the position
  }
  for (pos = 180; pos >= 0; pos -= 1) { // goes from 180 degrees to 0 degrees
    myservo.write(pos);              // tell servo to go to position in variable 'pos'
    delay(15);                       // waits 15ms for the servo to reach the position
  }

}
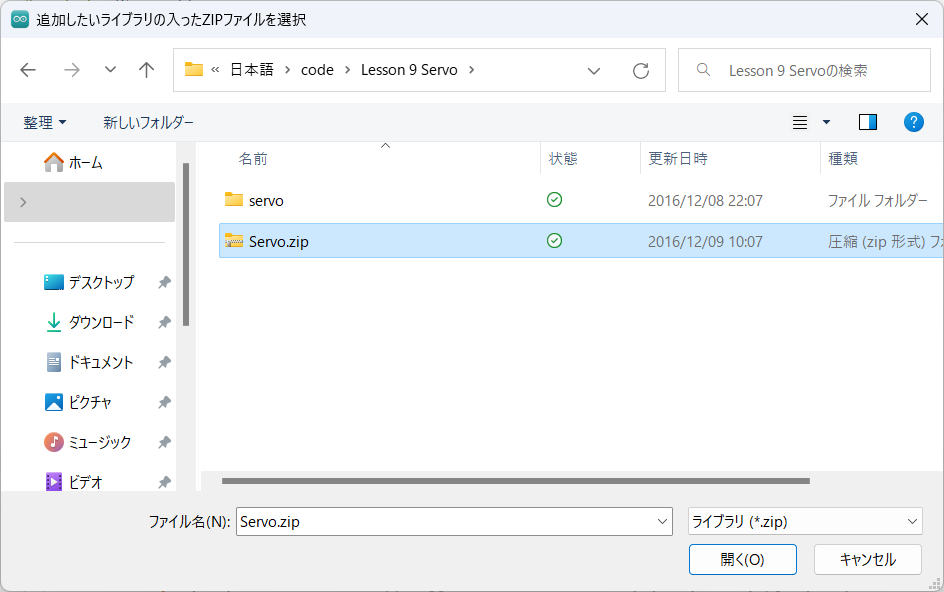
このコードを実行するには、Servoライブラリが必要になります。スケッチ⇒ライブラリをインクルードから「.ZIP形式のライブラリをインストール…」でチュートリアル付属のServoライブラリをインストールします。


なお、Servo.zipは、勢い余って解凍しないでくさい。コンパイルエラーが発生します。
実際にモータが動くと言いようもない嬉しさが込み上げてきます。


コメント
You have observed very interesting details!
ps nice internet site.Blog money
Thank you!