ここまで幾つかロボット制作として動きそうなロボットを制作してきましたが、思ったよりサーボモーターやセンサーの制御に苦労しています。そこで、以前より気になっていたROS2(Robot Operating System 2)を使ってみたいと思います。
まずは、Windows11にROS2の実行環境を作ってみて試してみたいと思います。
Docker Desktop のインストール
基本的にROS2を使うためにはUbuntuを使うのが最もハードルが低いです。
Windowsでも使えるようですが、手順等が複雑で、かつ日本語の情報が少ないためWindows上にUbuntuの仮想環境を作ってその上でROS2を使うのが一般的なようです。
インストールする環境
| OS | Windows 11 Home 22H2 |
| CPU | AMD Ryzen™ 7 7730U 2.00GH |
| メモリ | 16GB |
| GPU | AMD Radeon™ Graphics 2GB |
Hyper-V の有効化
Docker Desktop for Windows では、Windows10以降にサポートされたハイパーバイザーベースの x64 向け仮想化システムのHyper-V を使います。そのためインストールする前にHyper-Vを有効化する必要があります。
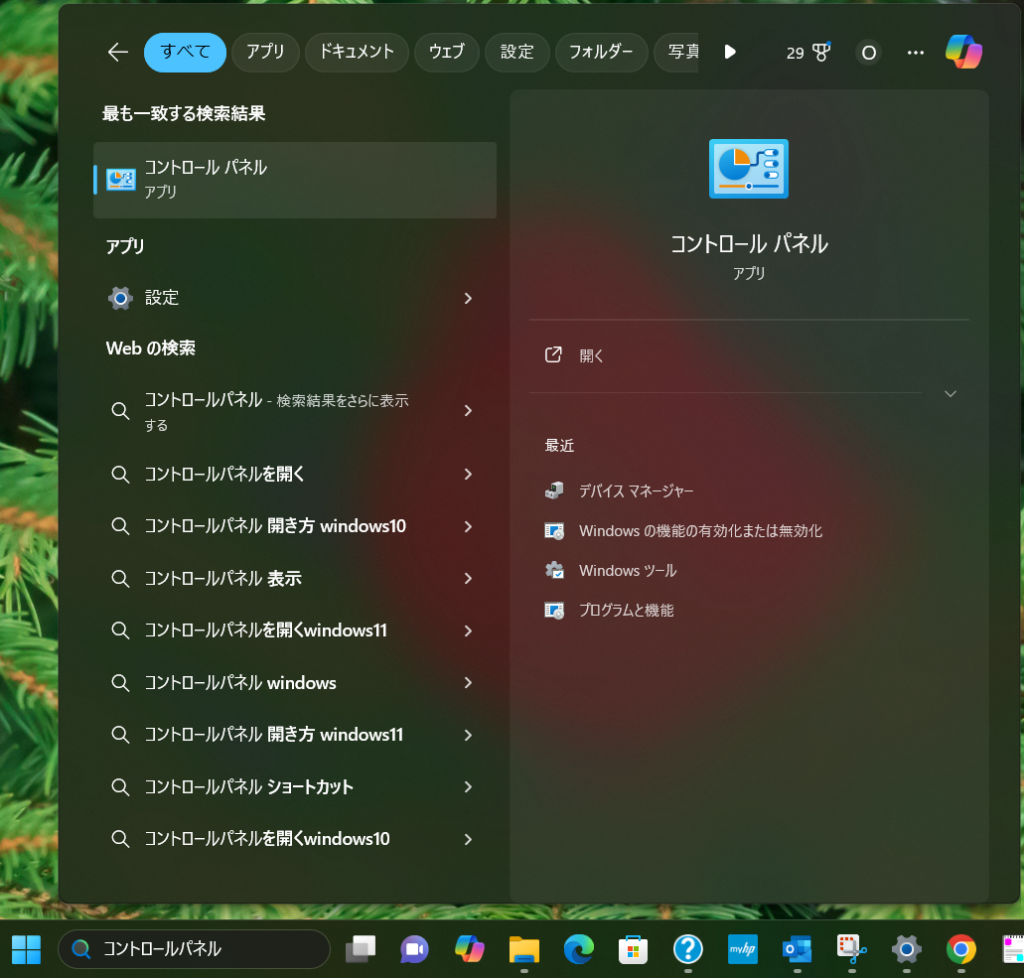
検索ボックスに「コントロールパネル」と入力して、表示されるアプリをクリックします。
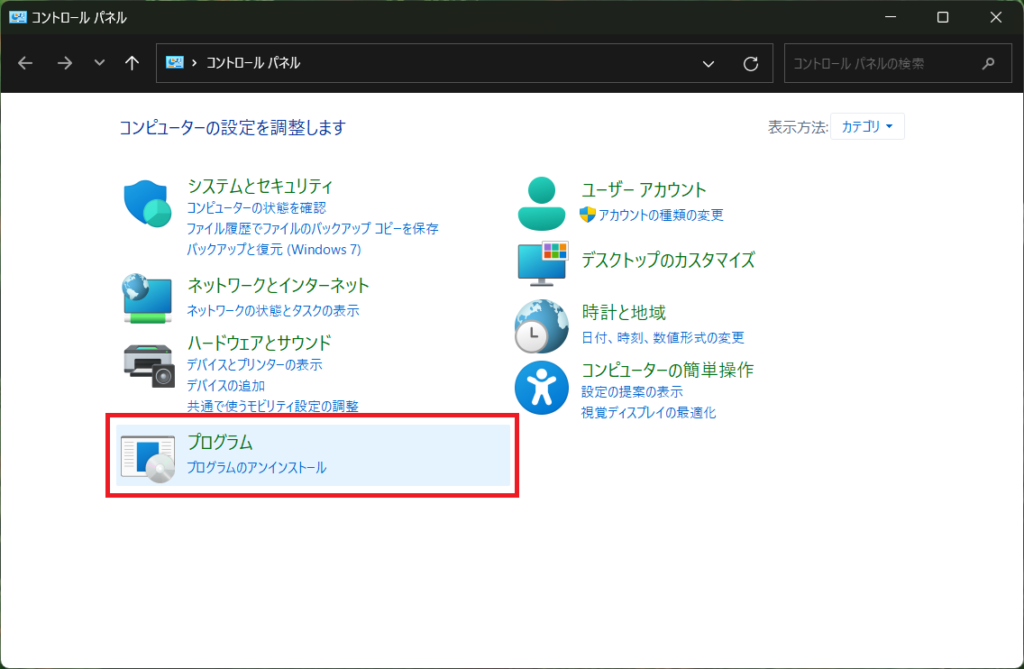
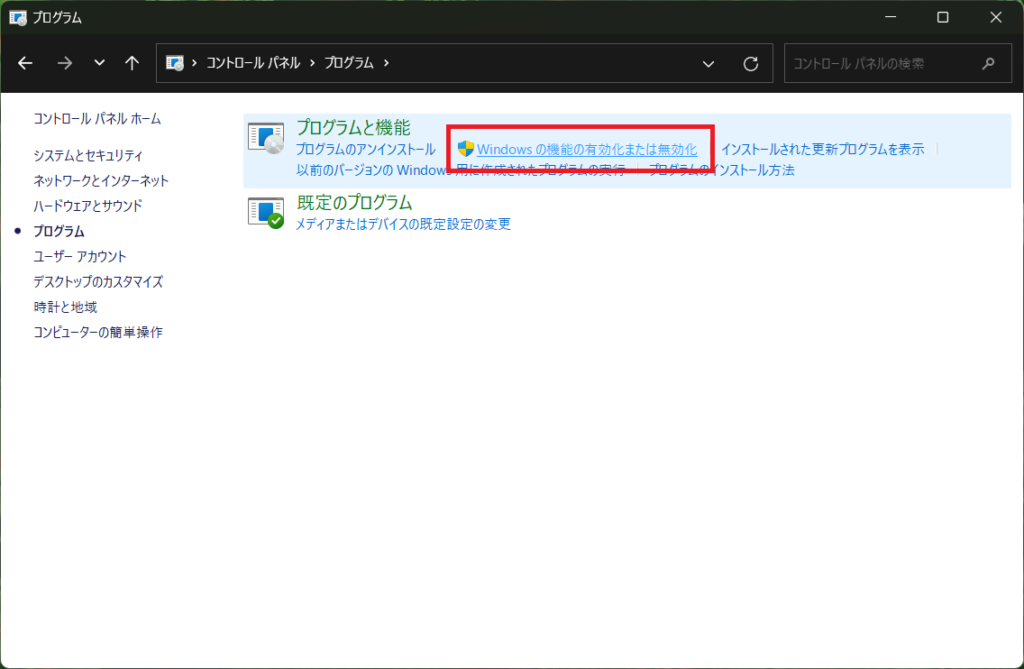
コントロールパネルの中の「プログラム」をクリックして、プログラムと機能の中の「Windows の機能の有効化または無効化」をクリックします。
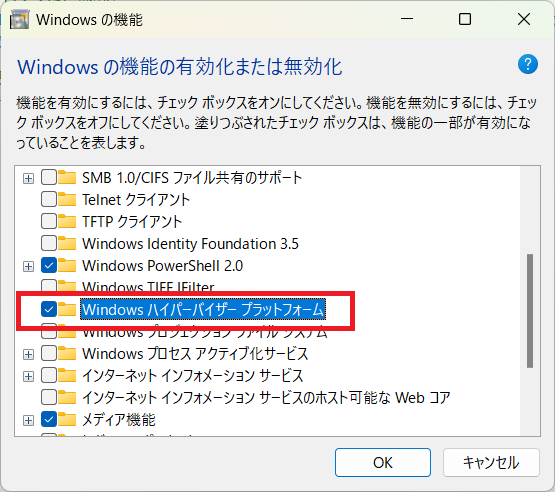
表示されるリストのなかから「Windows ハイパーバイザー プラットフォーム」にチェックを付けて「OK」ボタンを押します。
Docker Desktop for Windows のダウンロード
まずは、Docker Desktop のドキュメントのサイトを開きます。
Web検索で「docker desktop for windows」を入力すれば、このページに辿り着けます。
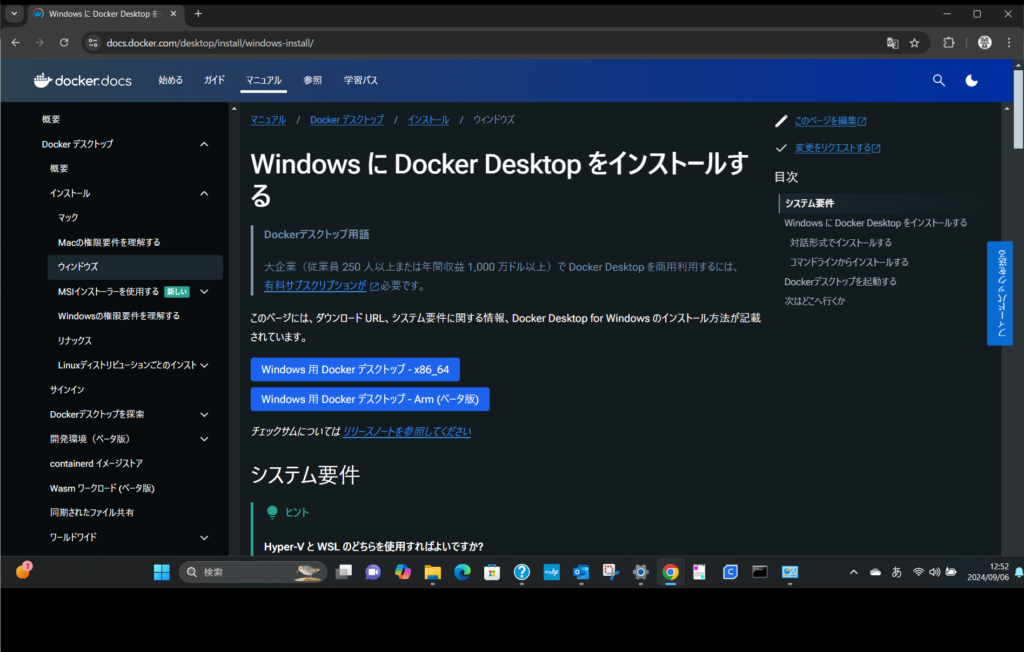
「Windows 用 Docker デスクトップ – x86_64」ボタンを押して「Docker Desktop Installer.exe」をダウンロードします。(翻訳しなかった場合は、以下のように表示されています)

Docker Desktop for Windows のインストール
ダウンロードした「Docker Desktop Installer.exe」を実行します。
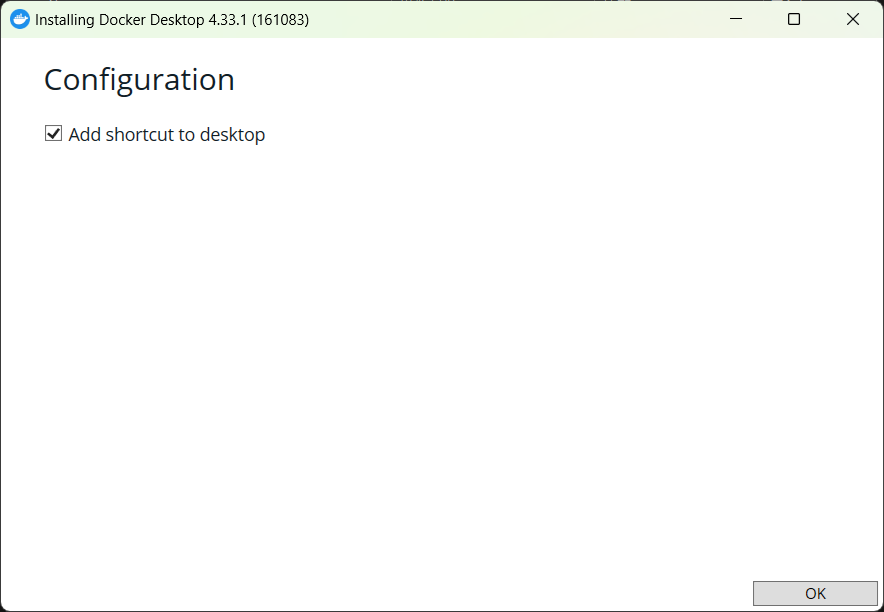
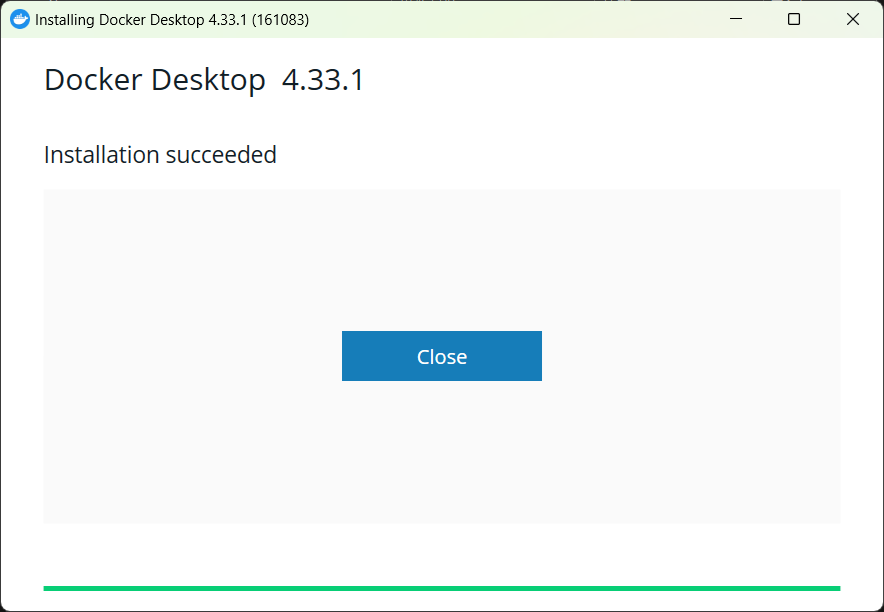
最初の画面で「OK」を押せば自動でインストールされて完了します。
Hyper-V以外にWSL2が使える場合は、オプション選択画面が表示される場合もあるようです。

Docker Desktop を起動します。
左図のようなアイコンをダブルクリックすると起動します。
起動すると以下のような画面が出るので「Accept」を次に進みます。

この画面に表示されているのは、上段が次のような内容です。
「同意を選択すると、サブスクリプション サービス契約、Docker データ処理契約、およびデータ プライバシー ポリシーに同意したことになります。」
下段が次のような内容です。
「従業員 250 名以上または年間収益 1,000 万ドル以上の企業で Docker Desktop を商用利用するには、有料サブスクリプション (Pro、Team、または Business) が必要です。サブスクリプションの詳細を見る」
上段には同意し、下段は個人使用で対象ではないので無償利用させて頂きます。
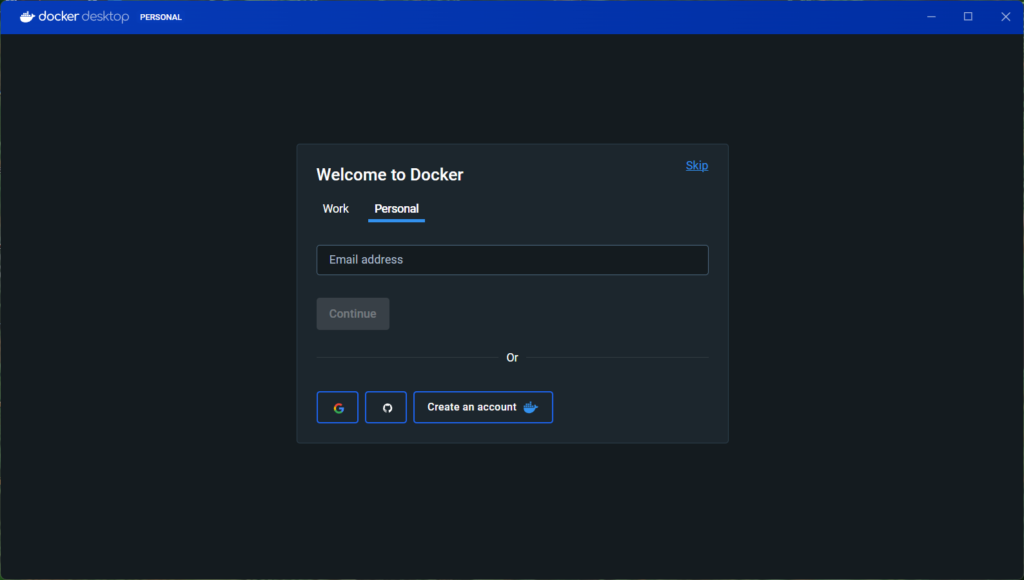
Welcom to Docker と表示されて「Work」「Personal」が表示されて、E-Mailアドレスを入れるようになっていましたが、SkipがあったのでSkipを押しました。
今後、アカウント作成の必要があれば、作成しようかと思います。
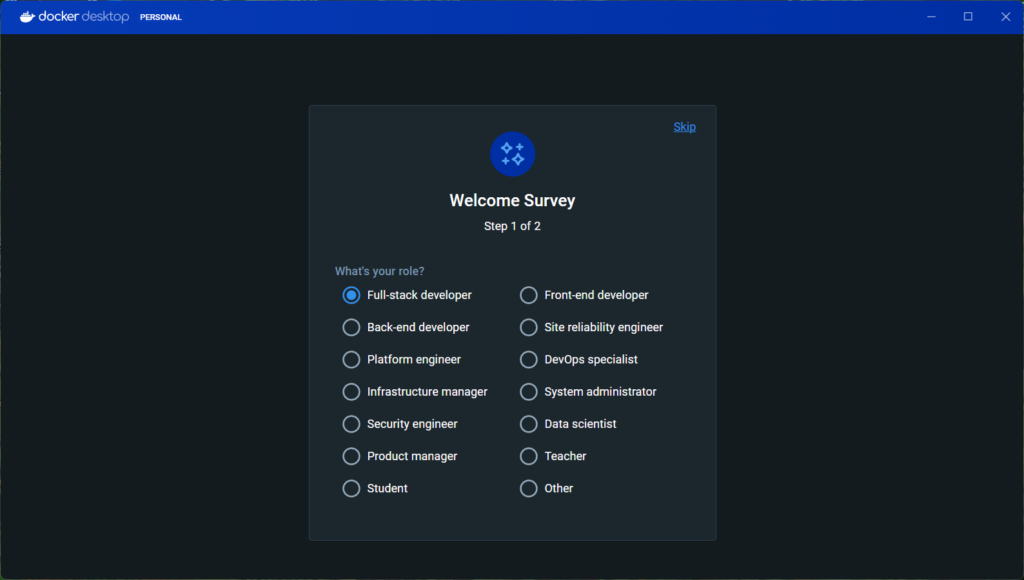
役職を聞かれましたが、あまりシックリ来るのが無かったので「Full-stack-developer」にしました。
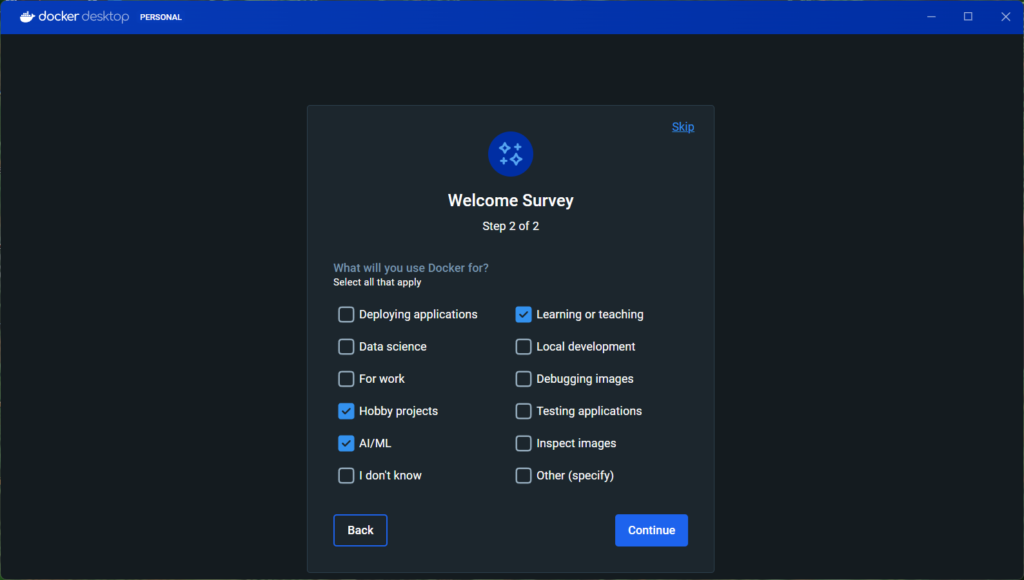
Dockerを何に使うのか聞かれたので、以下にチェックを付けました。
- Hobby projects … 趣味のプロジェクト
- AI/ML … 人工知能/機械学習
- Learning or teaching … 学習および教育
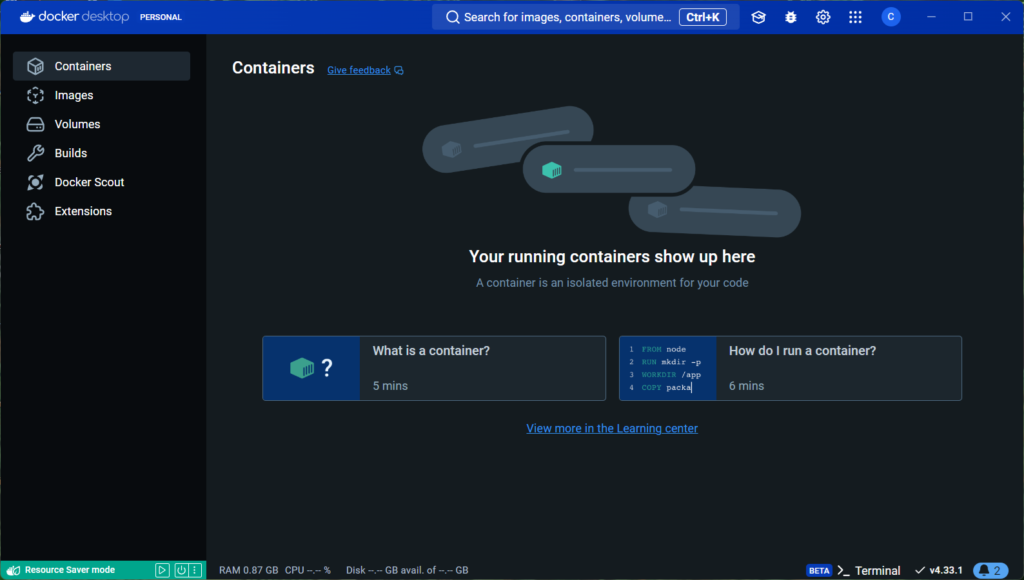
Docker Desktop が起動しました。
歯車マークを押すと設定が表示され変更することが出来ます。
とりあえずはデフォルトのまま使ってみたいと思います。
Docker を使ってみる
コマンドプロンプトを起動して「docker -v」と入力すると、以下のようにインストールしたバージョンが表示されます。
C:\Dev>docker -v
Docker version 27.1.1, build 6312585
次に Docker の公式リポジトリである DockerHub に用意されているイメージを使ってみます。
C:\Dev>docker run hello-world
Unable to find image 'hello-world:latest' locally
latest: Pulling from library/hello-world
c1ec31eb5944: Pull complete
Digest: sha256:53cc4d415d839c98be39331c948609b659ed725170ad2ca8eb36951288f81b75
Status: Downloaded newer image for hello-world:latest

Hello from Docker!
This message shows that your installation appears to be working correctly.

To generate this message, Docker took the following steps:
 1. The Docker client contacted the Docker daemon.
 2. The Docker daemon pulled the "hello-world" image from the Docker Hub.
    (amd64)
 3. The Docker daemon created a new container from that image which runs the
    executable that produces the output you are currently reading.
 4. The Docker daemon streamed that output to the Docker client, which sent it
    to your terminal.

To try something more ambitious, you can run an Ubuntu container with:
 $ docker run -it ubuntu bash

Share images, automate workflows, and more with a free Docker ID:
 https://hub.docker.com/

For more examples and ideas, visit:
 https://docs.docker.com/get-started/
何か表示されましたね。
ローカルにはhello-worldのイメージがないのでDockerHubのライブラリから引っぱってくると言っています。そして「Hello from Docker!」が表示されたら正常にインストールされました。とのことです。
リポジトリ操作
「docker search <キーワード>」で DockerHub 内の docker イメージを検索します。
C:\Dev>docker search hello-world
NAME                           DESCRIPTION                                      STARS     OFFICIAL
hello-world                    Hello World! (an example of minimal Dockeriz…   2306      [OK]
atlassian/hello-world                                                           0
rancher/hello-world            This container image is no longer maintained…   6
・・・(略)「docker pull <イメージ名>」でイメージをローカルにダウンロードします。
C:¥Dev>docker pull hello-world
Using default tag: latest
latest: Pulling from library/hello-world
Digest: sha256:53cc4d415d839c98be39331c948609b659ed725170ad2ca8eb36951288f81b75
Status: Image is up to date for hello-world:latest
docker.io/library/hello-world:latest
イメージ操作
docker イメージとは、docker コンテナの動作環境となるテンプレートファイルです。
docker イメージを元に docker コンテナを実行します。
「docker image」で Docker のイメージ操作に関するコマンドの一覧が表示されます。
C:\Dev>docker image
Usage:  docker image COMMAND
Manage images
Commands:
  build       Build an image from a Dockerfile
  history     Show the history of an image
  import      Import the contents from a tarball to create a filesystem image
  inspect     Display detailed information on one or more images
  load        Load an image from a tar archive or STDIN
  ls          List images
  prune       Remove unused images
  pull        Download an image from a registry
  push        Upload an image to a registry
  rm          Remove one or more images
  save        Save one or more images to a tar archive (streamed to STDOUT by default)
  tag         Create a tag TARGET_IMAGE that refers to SOURCE_IMAGE

Run 'docker image COMMAND --help' for more information on a command.「docker images」でローカルに保存されている Docker イメージの一覧が表示されます。
C:\Dev>docker images
REPOSITORY    TAG       IMAGE ID       CREATED         SIZE
hello-world latest d2c94e258dcb 16 months ago 13.3kB「docker image rm <イメージ名>」でローカルに保存されている Docker イメージを削除します。
C:\Dev>docker image rm hello-world
Error response from daemon: conflict: unable to remove repository reference "hello-world"
 (must force) - container 6d94b078c29c is using its referenced image d2c94e258dcb
ん、何かエラーが出ました。どうもコンテナから参照されているようですね。
後で出てくるコマンドですが「docker container ls -a」でコンテナの確認をしてみます。
C:\Dev>docker container ls -a
CONTAINER ID   IMAGE          COMMAND    CREATED          STATUS                      PORTS     NAMES
6d94b078c29c d2c94e258dcb "/hello" 47 minutes ago Exited (0) 47 minutes ago quirky_hawking quirky_hawking「docker image rm -f <イメージ名>」で強制的に削除することも可能です。
C:\Dev>docker image rm -f hello-world
Untagged: hello-world:latest
Untagged: hello-world@sha256:53cc4d415d839c98be39331c948609b659ed725170ad2ca8eb36951288f81b75
Deleted: sha256:d2c94e258dcb3c5ac2798d32e1249e42ef01cba4841c2234249495f87264ac5a
コンテナ操作
「docker container」で Docker のコンテナ操作に関するコマンドの一覧が表示されます。
C:\Dev>docker container
Usage:  docker container COMMAND
Manage containers
Commands:
  attach      Attach local standard input, output, and error streams to a running container
  commit      Create a new image from a container's changes
  cp          Copy files/folders between a container and the local filesystem
  create      Create a new container
  diff        Inspect changes to files or directories on a container's filesystem
  exec        Execute a command in a running container
  export      Export a container's filesystem as a tar archive
  inspect     Display detailed information on one or more containers
  kill        Kill one or more running containers
  logs        Fetch the logs of a container
  ls          List containers
  pause       Pause all processes within one or more containers
  port        List port mappings or a specific mapping for the container
  prune       Remove all stopped containers
  rename      Rename a container
  restart     Restart one or more containers
  rm          Remove one or more containers
  run         Create and run a new container from an image
  start       Start one or more stopped containers
  stats       Display a live stream of container(s) resource usage statistics
  stop        Stop one or more running containers
  top         Display the running processes of a container
  unpause     Unpause all processes within one or more containers
  update      Update configuration of one or more containers
  wait        Block until one or more containers stop, then print their exit codes

Run 'docker container COMMAND --help' for more information on a command.「docker container ls」で Docker コンテナを一覧表示します。
上記のコマンドでは実行中のコンテナしか表示されないので、停止したコンテナも表示するためにオプション「-a」を指定します。
c:\Dev>docker container ls -a
CONTAINER ID   IMAGE          COMMAND    CREATED             STATUS                         PORTS     NAMES
6d94b078c29c d2c94e258dcb "/hello" About an hour ago Exited (0) About an hour ago quirky_hawking「docker container rm <コンテナID>」でDocker コンテナを削除します。
複数のコンテナIDを指定して削除することも可能です。
c:\Dev>docker container rm 6d94b078c29c
6d94b078c29c
c:\Dev>docker container ls -a
CONTAINER ID IMAGE COMMAND CREATED STATUS PORTS NAMES
「docker container run <イメージ名>」で 指定された Docker イメージを基に Docker コンテナを作成し、コンテナ内でプログラムを実行します。
c:\Dev>docker container run hello-world

Hello from Docker!
This message shows that your installation appears to be working correctly.

...(略)
リファレンス
Docker.docs にリファレンスが載っているので、忘れたりオプションを調べたりするときは、こちらで確認して下さい。
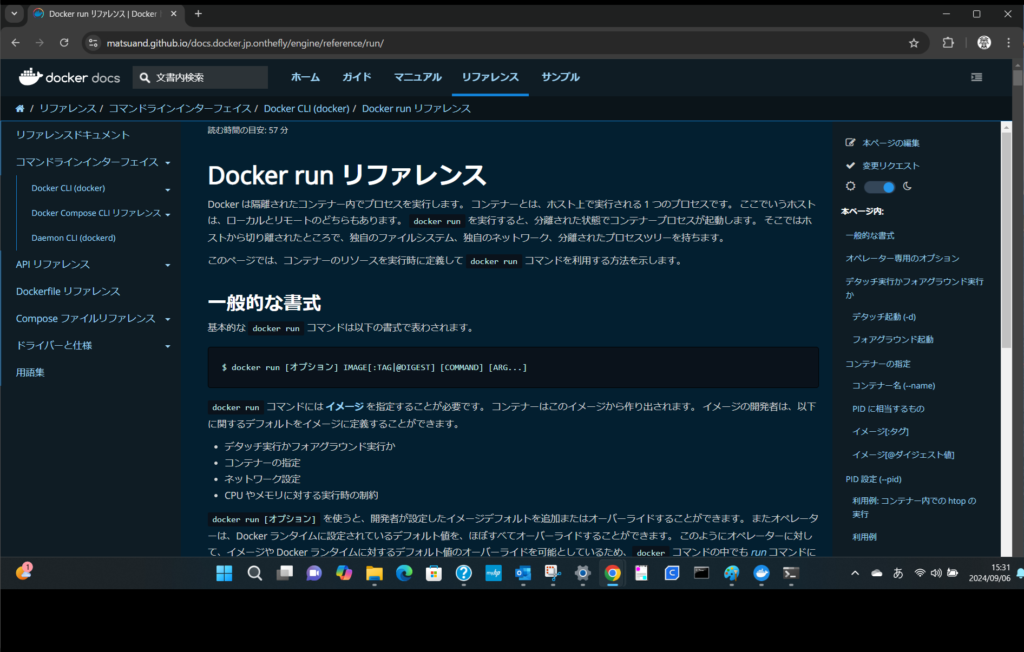
これで一通り、Dockerについては準備が出来たので、次のステップに進みたいと思います。
Ubuntu イメージのインストール
まずは、DockerHub で Ubuntu の Docker イメージを探します。
C:\Dev>docker search ubuntu
NAME                             DESCRIPTION                                      STARS     OFFICIAL
ubuntu                           Ubuntu is a Debian-based Linux operating sys…   17240     [OK]
ubuntu/chiselled-jre             [MOVED TO ubuntu/jre] Chiselled JRE: distrol…   3
ubuntu/mimir                     Ubuntu ROCK for Mimir, a horizontally scalab…   0
ubuntu/dotnet-deps               Chiselled Ubuntu for self-contained .NET & A…   16
ubuntu/jre                       Distroless Java runtime based on Ubuntu. Lon…   15
…(略)
Docker イメージをダウンロードします。
C:\Dev>docker pull ubuntu
Using default tag: latest
latest: Pulling from library/ubuntu
31e907dcc94a: Pull complete
Digest: sha256:8a37d68f4f73ebf3d4efafbcf66379bf3728902a8038616808f04e34a9ab63ee
Status: Downloaded newer image for ubuntu:latest
docker.io/library/ubuntu:latest
イメージの一覧を確認します。
C:\Dev>docker images
REPOSITORY    TAG       IMAGE ID       CREATED         SIZE
ubuntu        latest    edbfe74c41f8   5 weeks ago     78.1MB
hello-world   latest    d2c94e258dcb   16 months ago   13.3kB
ubuntu のタグは、latest
コンテナを実行します。
C:\Dev>docker run -it ubuntuUbuntu のコマンドを実行してみます。
root@f95c70f6d3d6:/# uname -a
Linux f95c70f6d3d6 5.15.153.1-microsoft-standard-WSL2 #1 SMP Fri Mar 29 23:14:13 UTC 2024 x86_64 x86_64 x86_64 GNU/Linux
Ubuntu のバージョンを確認してみます。
現時点の最新版「Ubuntu 24.04 Noble」ですね。
root@f95c70f6d3d6:/# cat /etc/lsb-release
DISTRIB_ID=Ubuntu
DISTRIB_RELEASE=24.04
DISTRIB_CODENAME=noble
DISTRIB_DESCRIPTION="Ubuntu 24.04.1 LTS"
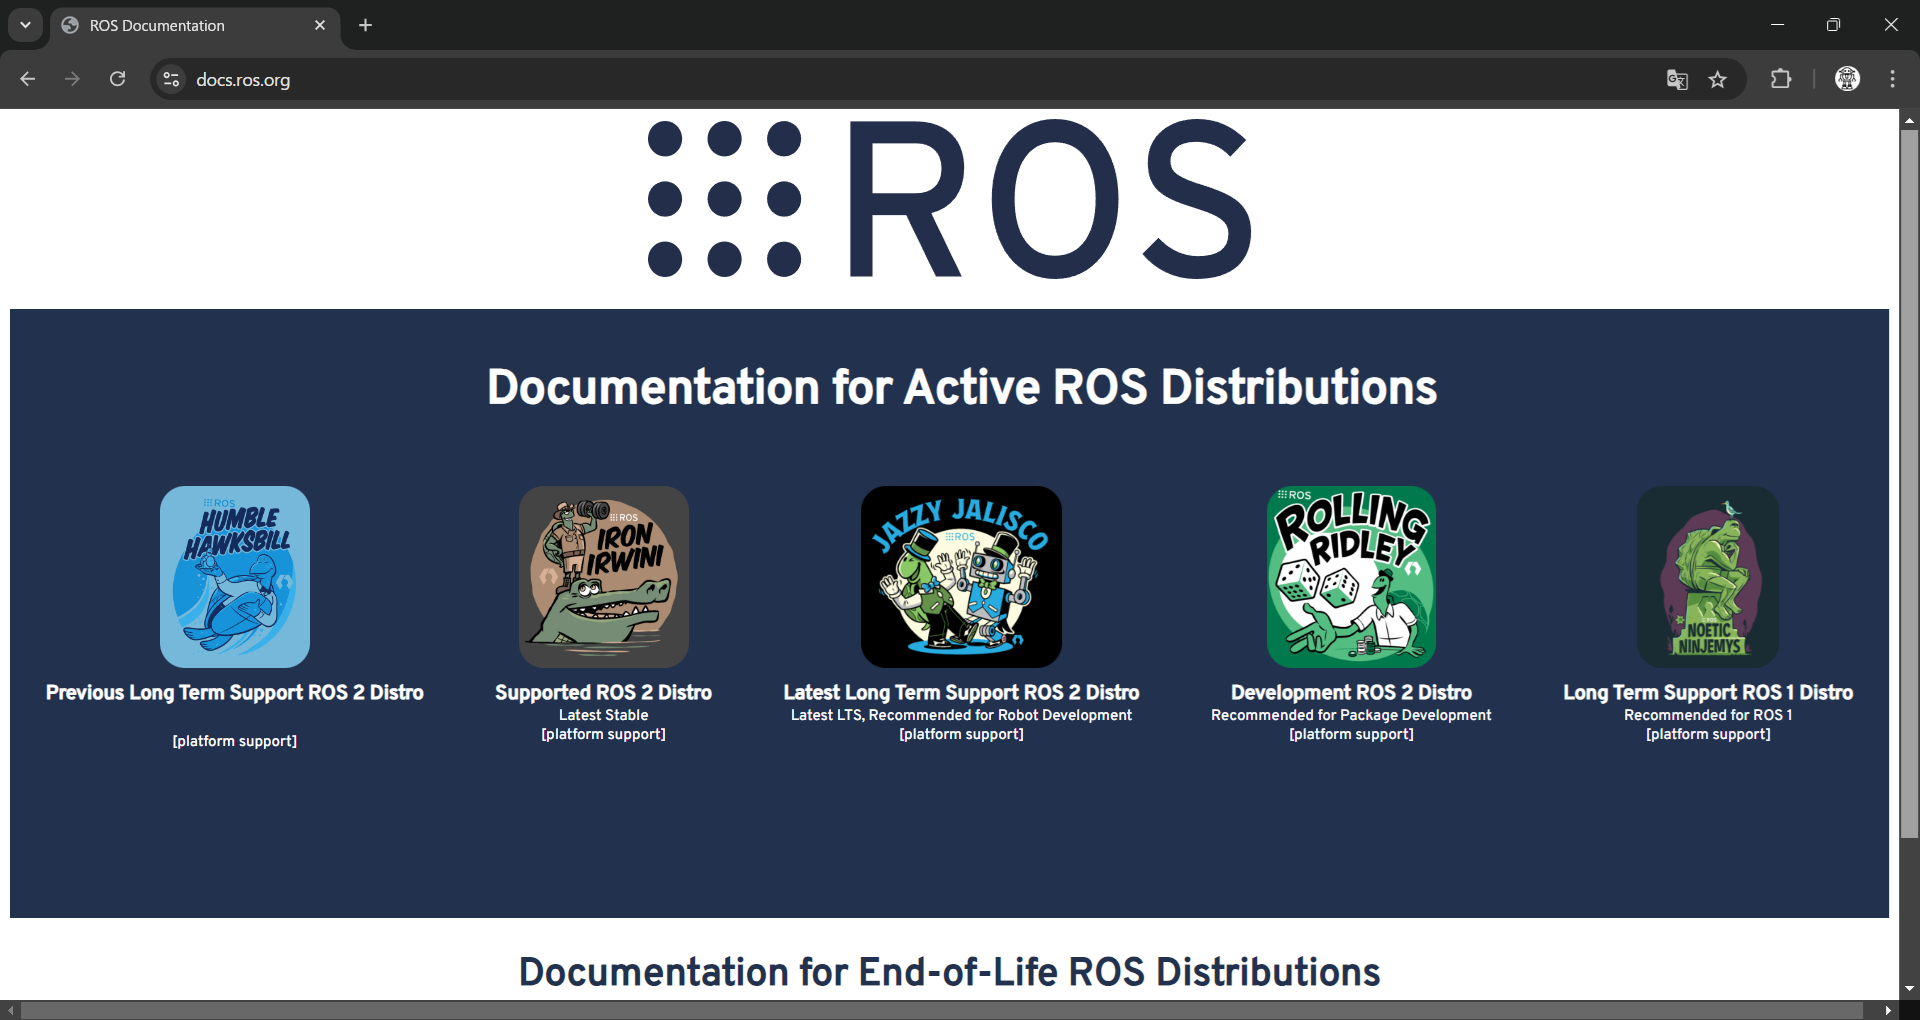
Ubuntuのバージョンと対応するROS2のディストリビューションが以下になります。
| バージョン | コードネーム | 対応するROS2 |
|---|---|---|
| Ubuntu 18.04 LTS | Bionic Beaver | ROS 2 Eloquent Elusor |
| Ubuntu 18.10 | Cosmic Cuttlefish | - |
| Ubuntu 19.04 | Disco Dingo | - |
| Ubuntu 19.10 | Eoan Ermine | - |
| Ubuntu 20.04 LTS | Focal Fossa | ROS 2 Foxy Fitzroy ROS 2 Galactic Geochelone |
| Ubuntu 20.10 | Groovy Gorilla | - |
| Ubuntu 21.04 | Hirsute Hippo | - |
| Ubuntu 21.10 | Impish Indri | - |
| Ubuntu 22.04 LTS | Jammy Jellyfish | ROS 2 Humble Hawksbill ROS 2 Iron Irwini |
| Ubuntu 22.10 | Kinetic Kudu | - |
| Ubuntu 23.04 | Lunar Lobster | - |
| Ubuntu 23.10 | Mantic Minotaur | - |
| Ubuntu 24.04 LTS | Noble Numbat | ROS 2 Jazzy Jalisco ROS 2 Rolling Ridley |
Ubuntuは、基本的に半年に1回のペースでバージョンが上がっていますが、基本的に広く使われているのは、バージョンの後ろに LTS と付いているバージョンになります。LTS とは Long-Time-Support の事で、概ね2年に1回のペースでLTS版がリリースされており、ROS2もこちらをターゲットにしているようです。LTSリリースの最新版が「Ubuntu 24.04 LTS (Noble Numbat)」になります。
もし、最新版ではなく、古いイメージをダウンロードしたい場合は、タグを探す必要があります。
DockerHub で Ubuntuを検索して「Tags」ページで検索することが出来ます。
例えば「Ubuntu 22.04 LTS (Jammy)」のイメージを探す場合は、「Filter Tags」に「jammy」と入力することで探すことが出来ます。検索は小文字にしないと表示されませんので注意してください。
https://hub.docker.com/_/ubuntu/tags?page_size=&ordering=&name=jammy
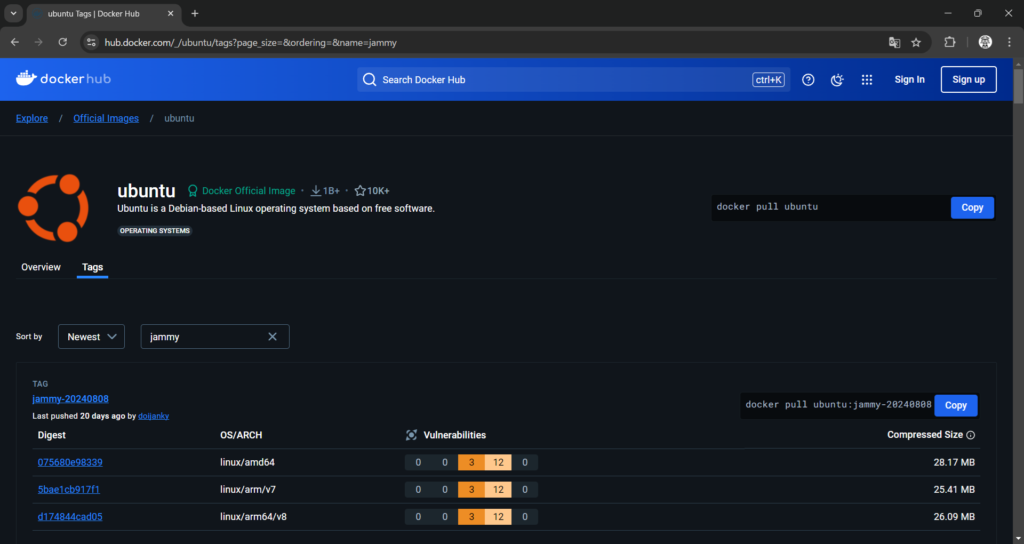
最新ではないタグのイメージをダウンロードする場合には、サイトにコマンドが表示されていますが、「docker pull ubuntu:jammy」のように入れるとダウンロードできます。
C:\Dev>docker pull ubuntu:jammy
jammy: Pulling from library/ubuntu
857cc8cb19c0: Pull complete
Digest: sha256:adbb90115a21969d2fe6fa7f9af4253e16d45f8d4c1e930182610c4731962658
Status: Downloaded newer image for ubuntu:jammy
docker.io/library/ubuntu:jammy

C:\Dev>docker images
REPOSITORY    TAG       IMAGE ID       CREATED         SIZE
ubuntu        jammy     53a843653cbc   3 weeks ago     77.9MB
ubuntu        focal     9df6d6105df2   3 weeks ago     72.8MB
ubuntu        latest    edbfe74c41f8   5 weeks ago     78.1MB
ubuntu        bionic    f9a80a55f492   15 months ago   63.2MB
hello-world   latest    d2c94e258dcb   16 months ago   13.3kB
さて、Ubuntu の画面に戻って、システムの最新化を行います。
root でログインしているので既にスーパーユーザでしたね。
root@f95c70f6d3d6:/# apt update
root@f95c70f6d3d6:/# apt upgrade
大量にUpdateがかかりました。
これでUbuntuの環境は、整いました。
X-Window のインストール
Xmingのインストール
Docker イメージからGUIを使ったプログラムを動かすために WindowsにXmingをインストールします。以下のサイトからダウンロードします。
http://www.straightrunning.com/XmingNotes/
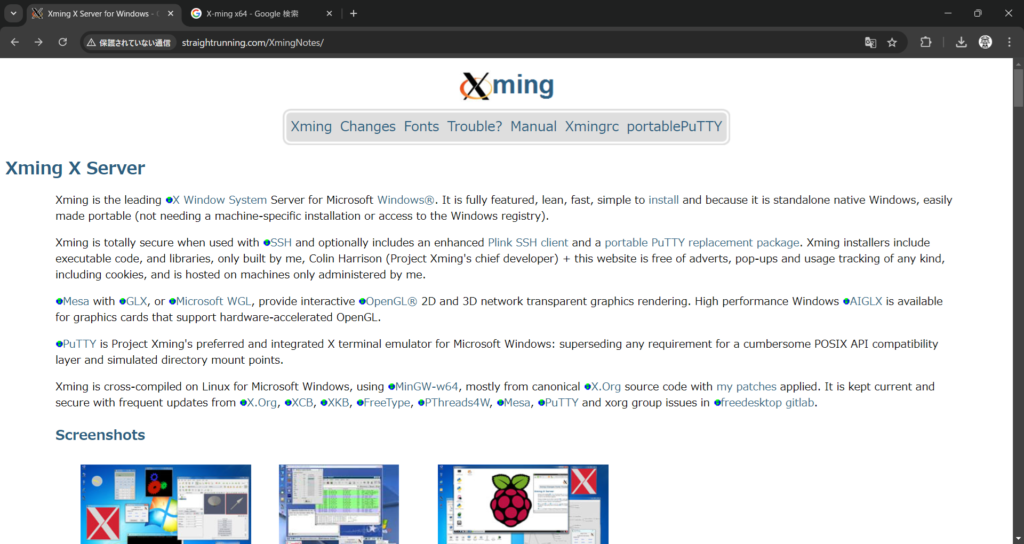
スクロールで少し下がるとReleasesの情報があり、そこからダウンロードできます。
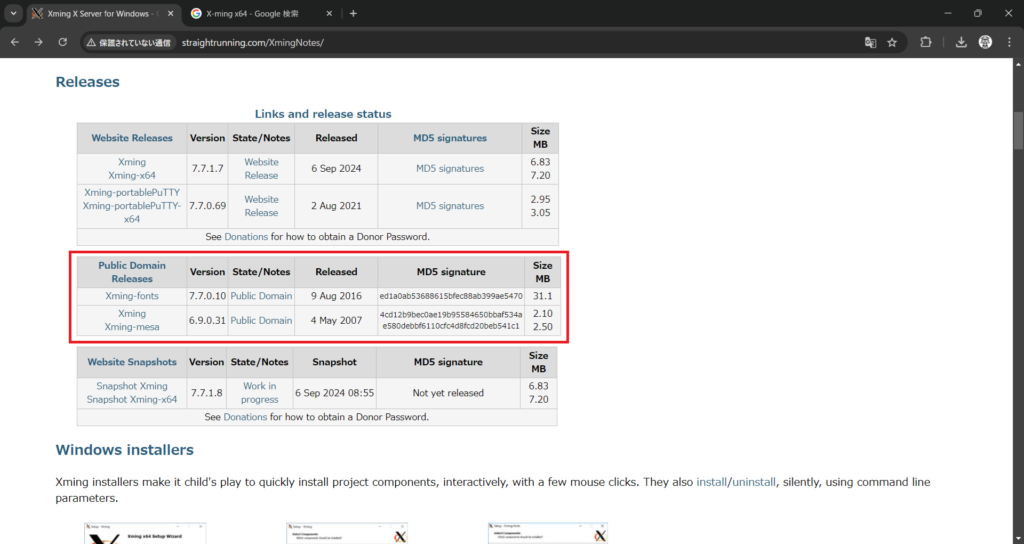
ダウンロードするのは、「Xming-fonts-7-7-0-10-setup.exe」と「Xming-6-9-0-31-setup.exe」です。
全ての設問にデフォルトままで進めました。
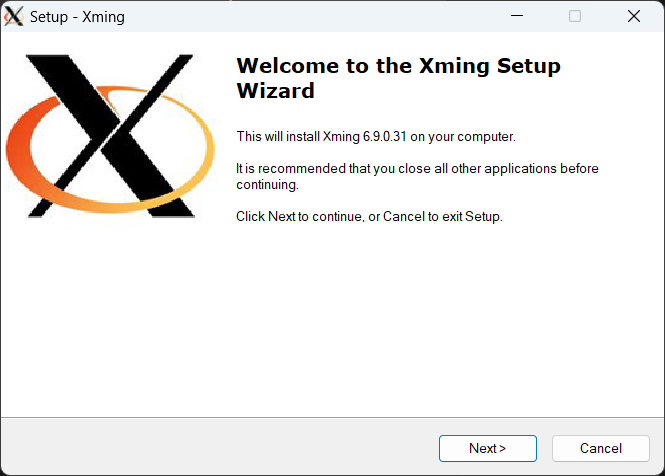
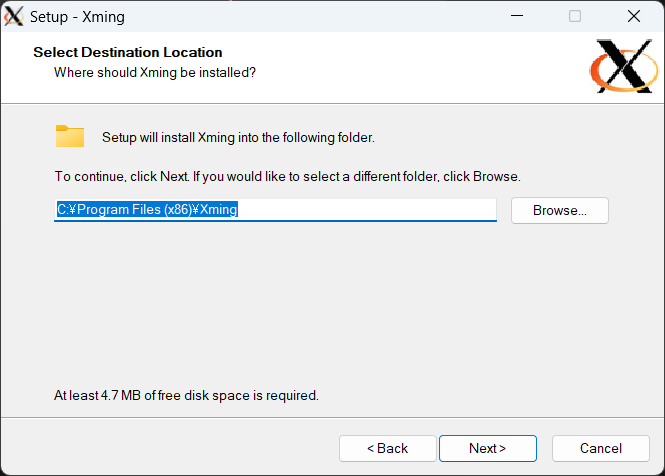
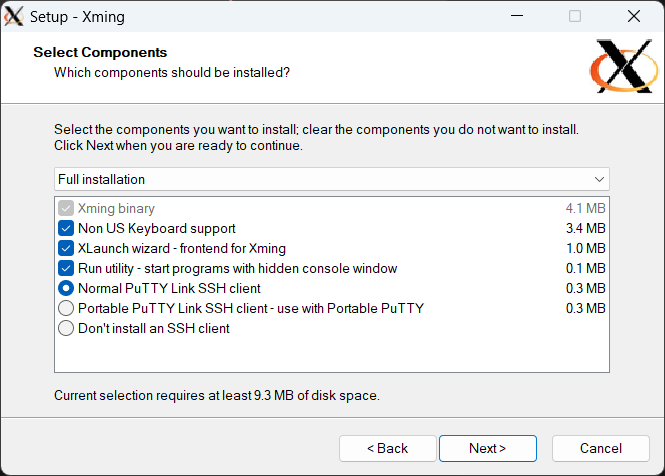
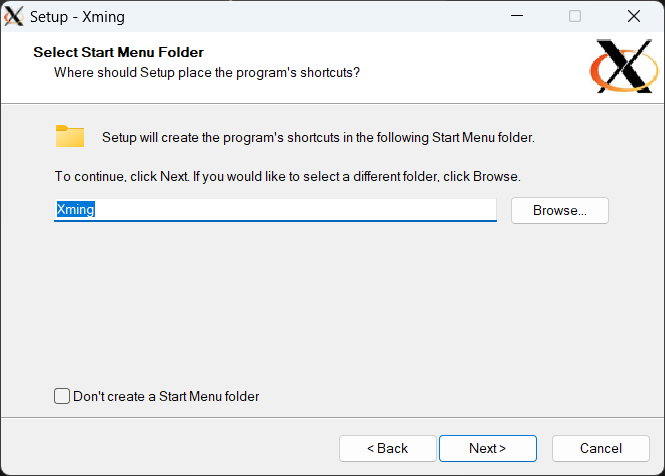
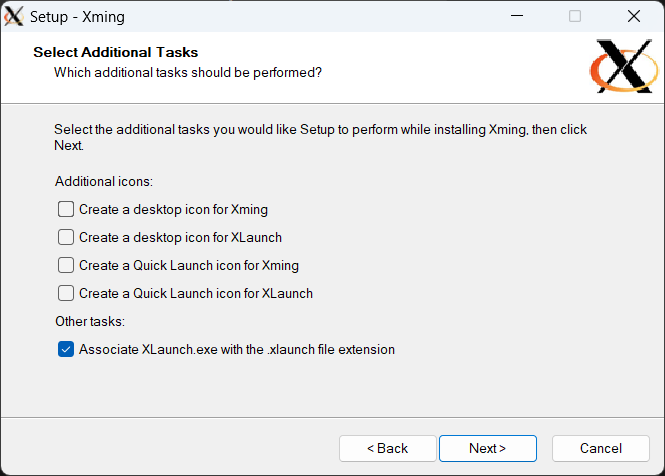
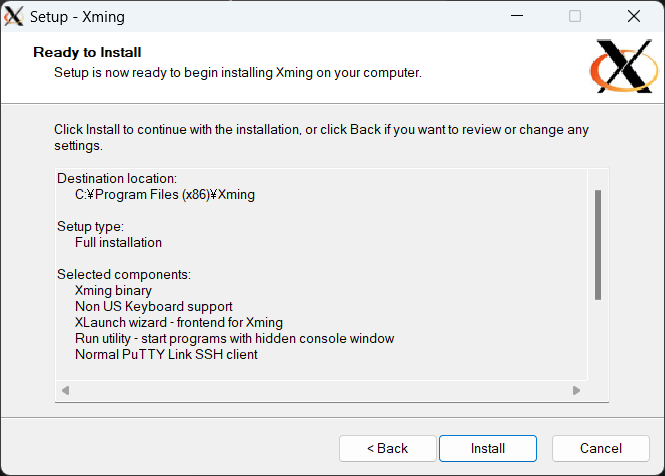
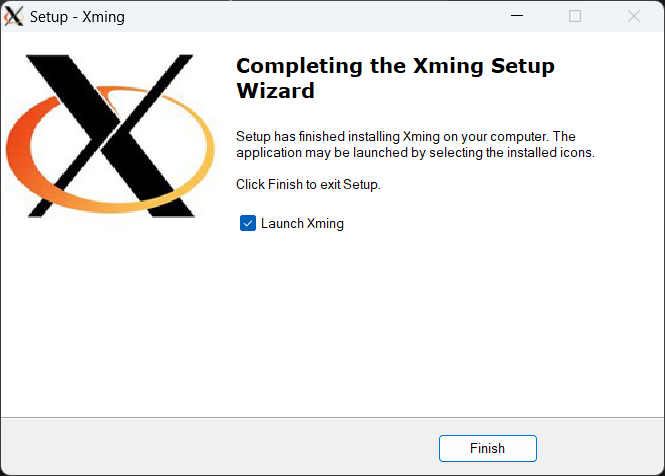
「Xming」アイコンをダブルクリックすると裏で「Xming Server0:0」というプログラムが起動しています。まだ、何もXServer対応のプログラムを入れていないので、ウィンドウを表示することは出来ませんでした。
VcXsrvのインストール
Xmingは、最終公開版が古いのと rqt が起動しなかったのでVcXsrvに変更しました。
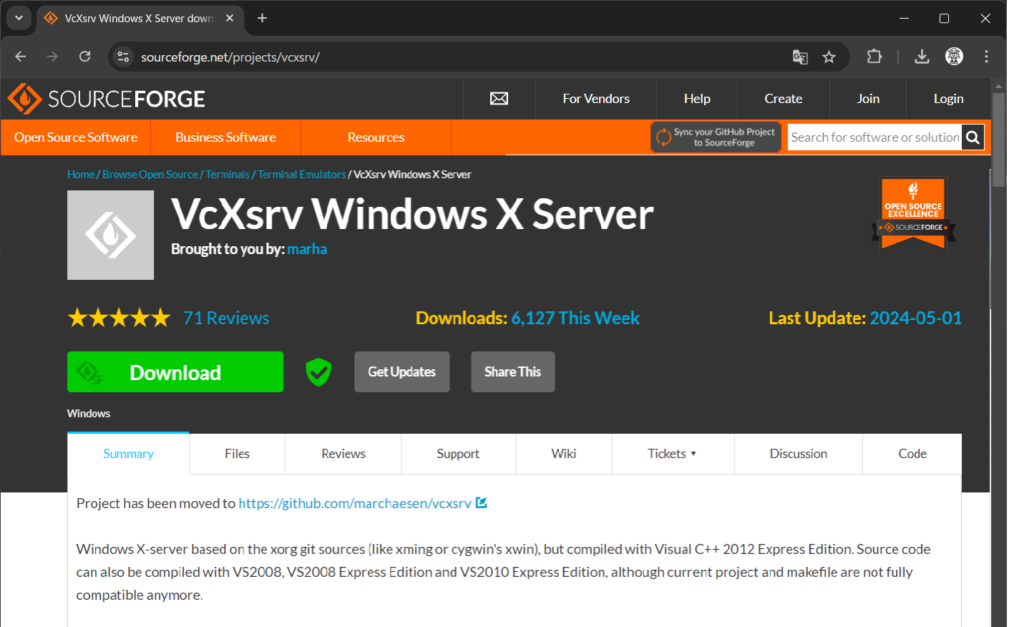
ダウンロードしてインストールしました。
なお、githubに移行したとありましたが、そちらからダウンロードしようとするとウィルス検出に引っかかりダウンロードできなかったので、こちらのサイトからダウンロードしました。
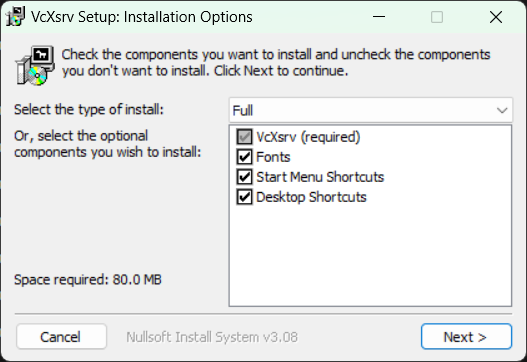
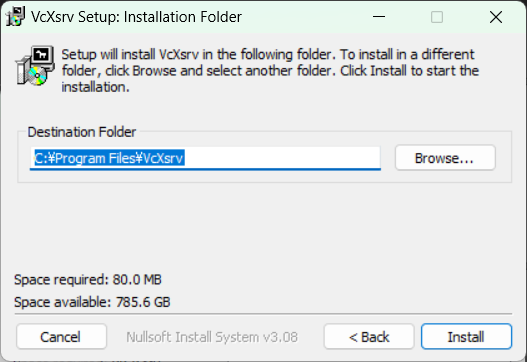
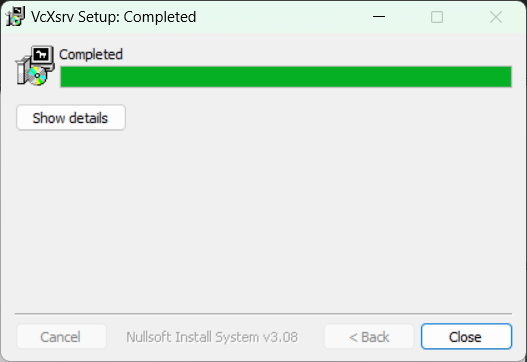
インストールが完了したらデスクトップにアイコンが作成されるので、起動します。
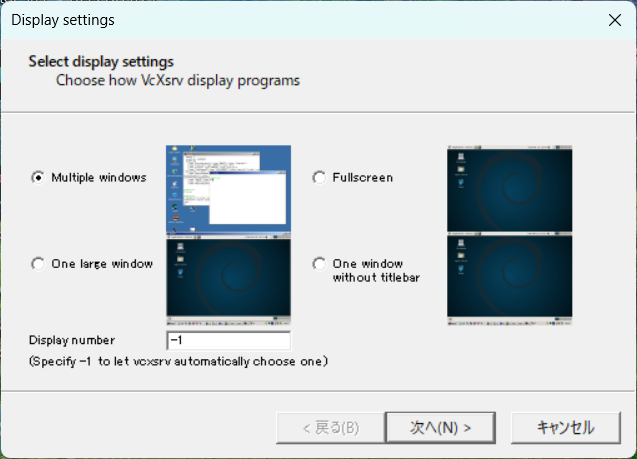
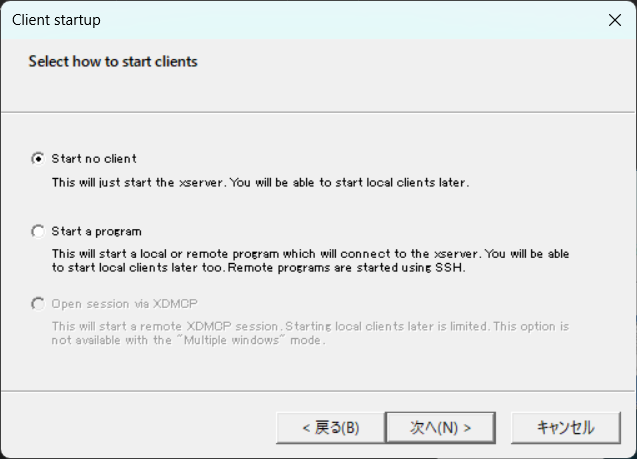
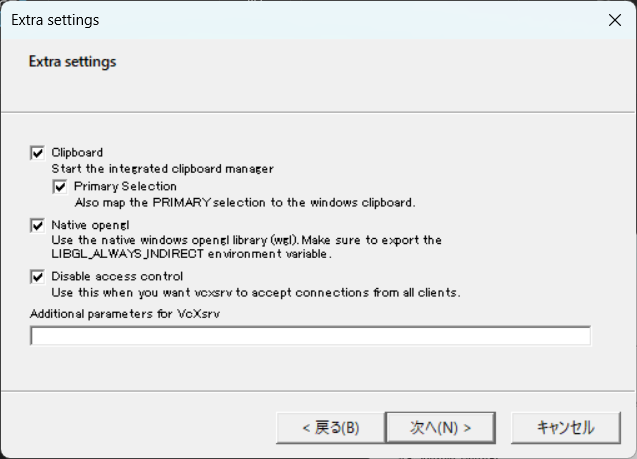
ランチャの設定は、基本的にそのままで良いですが、「Extra」設定で「Disable access control」にチェックを付けました。(付けない方が良いのかな?)
Ubuntu24.04にPython3をインストールするイメージの作成
最新のLTSイメージであるUbuntu24.04(Noble)にpython3をインストールするイメージファイルを作成します。実は、Ubuntu22.04(Jammy)とUbuntu24.04(Nobel)では、python3の環境構築方法が変わっています。
python3の仮想環境構築については、以下の記事で触れています。
Docker イメージを作成します。
以下のサイトを参考にさせて頂きました。
docker イメージを作成するDockerfileは、次のようにしました。
Dockerfile.py3
# Let's make a robot - Robot control #11 Let's try using ROS2
# https://gitlab.com/chikuma/ros2-jazzy
# インストール環境
#    ubuntu:24.04STL
#    Python3
#
# General guidelines and recommendations for writing 'Dockerfile':
# https://docs.docker.com/engine/userguide/eng-image/dockerfile_best-practices/
#
# @product   Dockerfile example to install Python3 on Ubuntu 24.04
# @author    chikuma <chikuma7410@gmail.com>
# @copyright 2024 chikuma
# @license   https://www.apache.org/licenses/LICENSE-2.0 Apache-2.0

# Base image
FROM ubuntu:24.04

# user information
LABEL maintainer="chikuma <chikuma7410@gmail.com>"
SHELL ["/bin/bash", "-c"]

# Install prerequisites
RUN set -x \
    && export DEBIAN_FRONTEND=noninteractive \
    && apt-get update \
    && apt-get install -y --no-install-recommends \
        gnupg2 \
        software-properties-common \
        language-pack-ja \
        tzdata \
        curl \
        lsb-release \
    && apt-get -y clean \
    && rm -rf /var/lib/apt/lists/*

# Set locale & timezone
RUN update-locale LANG=ja_JP.UTF-8 LANGUAGE=ja_JP:ja \
    && ln -sf /usr/share/zoneinfo/Asia/Tokyo /etc/localtime \
    && echo "Asia/Tokyo" > /etc/timezone

ENV LANG=ja_JP.UTF-8
ENV LC_ALL=ja_JP.UTF-8
ENV LC_CTYPE=ja_JP.UTF-8

# Install packages
RUN set -x \
    # 最新のPythonバージョンをインストールするために、deadsnakes PPAを追加
    && add-apt-repository ppa:deadsnakes/ppa \
    && apt-get update \
    && apt-get install -y --no-install-recommends \
        python3.12-dev \
        pipx \
    && apt-get -y clean \
    && rm -rf /var/lib/apt/lists/*

# Python / pipx
RUN ln -s $(which python3.12) /usr/bin/python
RUN pipx ensurepathDocker イメージを作成してみます。
上記のDockerfileは、「C:\Dev\ros2-jazzy\ubuntu-noble」というフォルダを作って、そこに保存しました。ご自身の端末で試す場合は、Dockerfileを保存した場所で実行してください。
C:\Dev\ros2-jazzy\ubuntu-noble>docker build -t ubuntu24.04-py3 -f Dockerfile.py3 .
[+] Building 2.3s (11/11) FINISHED                                                                    docker:desktop-linux
 => [internal] load build definition from Dockerfile.py3                                                              0.0s
 => => transferring dockerfile: 1.80kB                                                                                0.0s
 => [internal] load metadata for docker.io/library/ubuntu:24.04                                                       2.2s
 => [auth] library/ubuntu:pull token for registry-1.docker.io                                                         0.0s
 => [internal] load .dockerignore                                                                                     0.0s
 => => transferring context: 2B                                                                                       0.0s
 => [1/6] FROM docker.io/library/ubuntu:24.04@sha256:8a37d68f4f73ebf3d4efafbcf66379bf3728902a8038616808f04e34a9ab63e  0.0s
 => CACHED [2/6] RUN set -x     && export DEBIAN_FRONTEND=noninteractive     && apt-get update     && apt-get instal  0.0s
 => CACHED [3/6] RUN update-locale LANG=ja_JP.UTF-8 LANGUAGE=ja_JP:ja     && ln -sf /usr/share/zoneinfo/Asia/Tokyo /  0.0s
 => CACHED [4/6] RUN set -x     && add-apt-repository ppa:deadsnakes/ppa     && apt-get update     && apt-get instal  0.0s
 => CACHED [5/6] RUN ln -s $(which python3.12) /usr/bin/python                                                        0.0s
 => CACHED [6/6] RUN pipx ensurepath                                                                                  0.0s
 => exporting to image                                                                                                0.0s
 => => exporting layers                                                                                               0.0s
 => => writing image sha256:9bb5bcdda7eb64d9bc3b28eb3b54c2ef08d03739e9de1c118d597f686d437b55                          0.0s
これで Docker イメージが作成されました。イメージを確認してみます。
C:\Dev\ros2-jazzy\ubuntu-noble>docker images
REPOSITORY        TAG       IMAGE ID       CREATED             SIZE
ubuntu24.04-py3   latest    07b1761e7dc1   About an hour ago   340MB
ubuntu            jammy     53a843653cbc   3 weeks ago         77.9MB
ubuntu            focal     9df6d6105df2   3 weeks ago         72.8MB
ubuntu            latest    edbfe74c41f8   5 weeks ago         78.1MB
ubuntu            bionic    f9a80a55f492   15 months ago       63.2MB
hello-world       latest    d2c94e258dcb   16 months ago       13.3kB
作成したイメージを実行します。
「docker run -it <イメージ名>」でコンテナを作成&実行します。
C:\Dev\ros2-jazzy\ubuntu-noble>docker run -it ubuntu24.04-py3python のバージョンと pip のバージョンを調べます。
root@d722da462d6a:/# python --version
Python 3.12.3

root@d722da462d6a:/# pipx --version
1.4.3
python 3.12.3 がインストールされいることを確認できました。
ちょっとだけ動かしてみます。6*3を計算しました。
root@d722da462d6a:/# python3
Python 3.12.3 (main, Jul 31 2024, 17:43:48) [GCC 13.2.0] on linux
Type "help", "copyright", "credits" or "license" for more information.
>>> 6*3
18
>>>
Ubuntu24.04にROS2 Jazzyをインストールするイメージの作成
先ほどはPython3までを追加するイメージを作成しましたが、ついに本命のROS2 Jazzyまでを追加するイメージを作成します。以下のようなDockerfileを作成しました。
Dockerfile
# Let's make a robot - Robot control #11 Let's try using ROS2
# https://gitlab.com/chikuma/ros2-jazzy
# Installation environment
#    ubuntu:24.04STL
#    Python3
#    ROS 2 Jazzy Jalisco
#
# General guidelines and recommendations for writing 'Dockerfile':
# https://docs.docker.com/engine/userguide/eng-image/dockerfile_best-practices/
#
# @product   Dockerfile example to install Python3 on Ubuntu 24.04
# @author    chikuma <chikuma7410@gmail.com>
# @copyright 2024 chikuma
# @license   https://www.apache.org/licenses/LICENSE-2.0 Apache-2.0

# Base image
FROM ubuntu:24.04

ENV DEBIAN_FRONTEND=noninteractive

# user information
LABEL maintainer="chikuma <chikuma7410@gmail.com>"
SHELL ["/bin/bash", "-c"]

# Install prerequisites
RUN set -x \
    && export DEBIAN_FRONTEND=noninteractive \
    && apt-get update \
    && apt-get upgrade -y \
    && apt-get install -y --no-install-recommends \
    	bash-completion build-essential curl gnupg2 lsb-release \
        language-pack-ja software-properties-common \
        tzdata git tmux wget nano gedit x11-apps eog \
    && apt-get -y clean \
    && rm -rf /var/lib/apt/lists/*

# Set locale & timezone
RUN update-locale LANG=ja_JP.UTF-8 LANGUAGE=ja_JP:ja \
    && ln -sf /usr/share/zoneinfo/Asia/Tokyo /etc/localtime \
    && echo "Asia/Tokyo" > /etc/timezone

ENV LANG=ja_JP.UTF-8
ENV LC_ALL=ja_JP.UTF-8
ENV LC_CTYPE=ja_JP.UTF-8

# Install python
RUN set -x \
    # Add the deadsnakes PPA to install the latest Python version.
    && add-apt-repository ppa:deadsnakes/ppa \
    && apt-get update \
    && apt-get install -y --no-install-recommends \
        python3.12-dev \
        pipx \
    && apt-get -y clean \
    && rm -rf /var/lib/apt/lists/*

RUN ln -s $(which python3.12) /usr/bin/python
RUN pipx ensurepath

# Install ROS2 jazzy Jalisco
RUN set -x \
	&& apt-get install -y software-properties-common \
	&& apt-add-repository -y universe \
	&& apt-get update && apt-get install -y curl \
	&& curl -sSL https://raw.githubusercontent.com/ros/rosdistro/master/ros.key -o /usr/share/keyrings/ros-archive-keyring.gpg \
	&& echo "deb [arch=$(dpkg --print-architecture) signed-by=/usr/share/keyrings/ros-archive-keyring.gpg] http://packages.ros.org/ros2/ubuntu $(. /etc/os-release && echo $UBUNTU_CODENAME) main" | tee /etc/apt/sources.list.d/ros2.list > /dev/null \
	&& apt-get update && apt-get upgrade -y \
	&& apt-get install -y ros-dev-tools \
	&& apt-get install -y ros-jazzy-desktop \
	&& apt-get install -y ros-jazzy-ros-base

# Setting the work directory
RUN echo "source /opt/ros/jazzy/setup.bash" >> ~/.bashrc
RUN source /opt/ros/jazzy/setup.bash
RUN mkdir -p ~/ros2_ws/src
RUN cd ~/ros2_ws/src

# Official ROS2 Sample and Demo Downloads
RUN git clone -b jazzy https://github.com/ros2/examples ~/ros2_ws/src/ros2_examples
RUN git clone -b jazzy https://github.com/ros2/demos ~/ros2_ws/src/ros2_demos

# Run tmux when running a container
# ENTRYPOINT ["tmux"]
イメージファイルをビルドしてみます。
C:\Dev\ros2-jazzy>docker build -t ros2-jazzy -f Dockerfile .
[+] Building 7.1s (16/16) FINISHED                                                                 docker:desktop-linux
 => [internal] load build definition from Dockerfile                                                               0.0s
 => => transferring dockerfile: 2.94kB                                                                             0.0s
 => [internal] load metadata for docker.io/library/ubuntu:24.04                                                    2.7s
 => [auth] library/ubuntu:pull token for registry-1.docker.io                                                      0.0s
 => [internal] load .dockerignore                                                                                  0.0s
 => => transferring context: 2B                                                                                    0.0s
 => [ 1/11] FROM docker.io/library/ubuntu:24.04@sha256:8a37d68f4f73ebf3d4efafbcf66379bf3728902a8038616808f04e34a9  0.0s
 => CACHED [ 2/11] RUN set -x     && export DEBIAN_FRONTEND=noninteractive     && apt-get update     && apt-get u  0.0s
 => CACHED [ 3/11] RUN update-locale LANG=ja_JP.UTF-8 LANGUAGE=ja_JP:ja     && ln -sf /usr/share/zoneinfo/Asia/To  0.0s
 => CACHED [ 4/11] RUN set -x     && add-apt-repository ppa:deadsnakes/ppa     && apt-get update     && apt-get i  0.0s
 => CACHED [ 5/11] RUN ln -s $(which python3.12) /usr/bin/python                                                   0.0s
 => CACHED [ 6/11] RUN pipx ensurepath                                                                             0.0s
 => CACHED [ 7/11] RUN set -x  && apt-get install -y software-properties-common  && apt-add-repository -y univers  0.0s
 => CACHED [ 8/11] RUN echo "source /opt/ros/jazzy/setup.bash" >> ~/.bashrc                                        0.0s
 => CACHED [ 9/11] RUN source /opt/ros/jazzy/setup.bash                                                            0.0s
 => CACHED [10/11] RUN mkdir -p ~/ros2_ws/src                                                                      0.0s
 => [11/11] RUN cd ~/ros2_ws/src  && git clone -b jazzy https://github.com/ros2/examples ros2_examples  && git cl  4.2s
 => exporting to image                                                                                             0.1s
 => => exporting layers                                                                                            0.1s
 => => writing image sha256:013618eb6333aea7d791194f6bdce08c58324727ee7fda71efb8838936bfc859                       0.0s
 => => naming to docker.io/library/ros2-jazzy                                                                      0.0s

View build details: docker-desktop://dashboard/build/desktop-linux/desktop-linux/8o8gskrhwuxedz1zv0djmycac

What's next:
    View a summary of image vulnerabilities and recommendations → docker scout quickview
ビルドに成功しました。
コンテナを実行してみます。この際にX-Windowサーバーに接続しますので、Xmingを起動しておきます。
C:\Dev\ros2-jazzy>docker run -it -e DISPLAY="host.docker.internal:0.0" --rm ros2-jazzy
root@3a7e00b8b204:/# xeyes
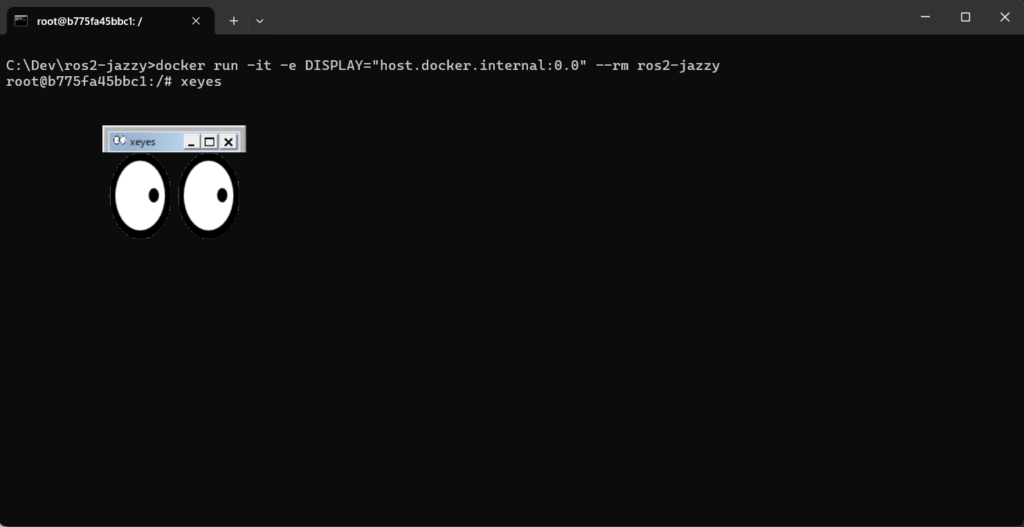
GUIプログラムのxeyesも立ち上がりました。
ROS2 Jazzy Jalisco の実行環境構築が完了しました。
ROS2 Jazzy を使ってみる
それではコンテナを実行して、ROS2を使ってみたいと思います。
先ほどのコンテナの中にROS2公式のデモとサンプルプログラムを保存しています。
最初のチュートリアル
これは公式ドキュメントにも書いてある。インストール出来たかどうかの確認です。
~/ros2_ws/src/ros2_demos に移動して何がインストールされているか確認します。
root@b775fa45bbc1:~# cd ~/ros2_ws/src/ros2_demos/
root@b775fa45bbc1:~/ros2_ws/src/ros2_demos# ls
CODEOWNERS        composition            image_tools         pendulum_control         topic_statistics_demo
CONTRIBUTING.md   demo_nodes_cpp         intra_process_demo  pendulum_msgs
LICENSE           demo_nodes_cpp_native  lifecycle           pytest.ini
README.md         demo_nodes_py          lifecycle_py        quality_of_service_demo
action_tutorials  dummy_robot            logging_demo        topic_monitor
root@b775fa45bbc1:~/ros2_ws/src/ros2_demos#
コンテナを2つ起動します。
1つのコンテナでC++で作ったプログラムを実行します。
「ros2 run demo_nodes_cpp talker」を実行します。
root@b775fa45bbc1:~/ros2_ws/src/ros2_demos# ros2 run demo_nodes_cpp talker
[INFO] [1725690522.706306776] [talker]: Publishing: 'Hello World: 1'
[INFO] [1725690523.706310990] [talker]: Publishing: 'Hello World: 2'
[INFO] [1725690524.705370920] [talker]: Publishing: 'Hello World: 3'
[INFO] [1725690525.705419057] [talker]: Publishing: 'Hello World: 4'
[INFO] [1725690526.705369634] [talker]: Publishing: 'Hello World: 5'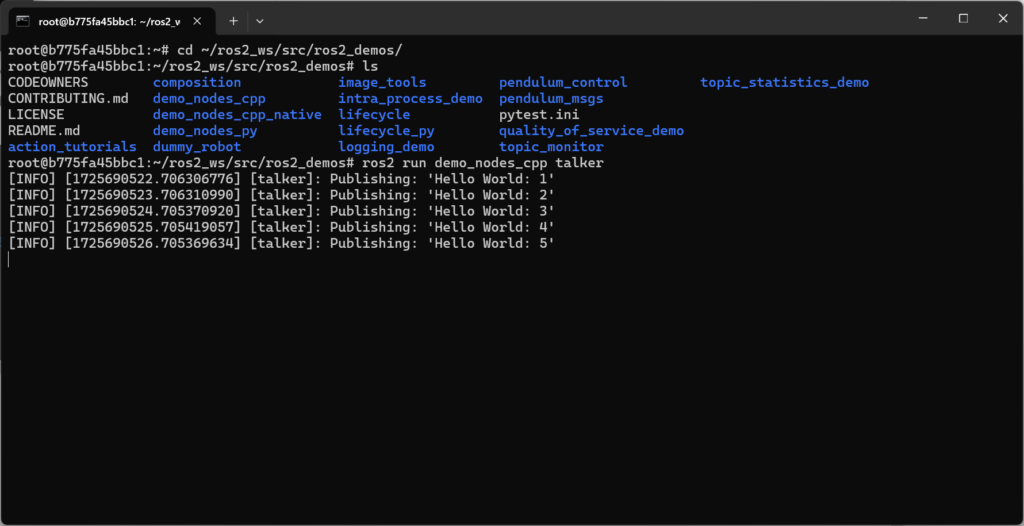
別のコンテナでPythonで作ったプログラムを実行します。
「ros2 run demo_nodes_py listener」を実行します。
root@44c5951457ff:~/ros2_ws/src/ros2_demos# ros2 run demo_nodes_py listener
[INFO] [1725690627.721531299] [listener]: I heard: [Hello World: 106]
[INFO] [1725690628.703401578] [listener]: I heard: [Hello World: 107]
[INFO] [1725690629.703582256] [listener]: I heard: [Hello World: 108]
[INFO] [1725690630.703049659] [listener]: I heard: [Hello World: 109]
[INFO] [1725690631.703655144] [listener]: I heard: [Hello World: 110]
[INFO] [1725690632.703248158] [listener]: I heard: [Hello World: 111]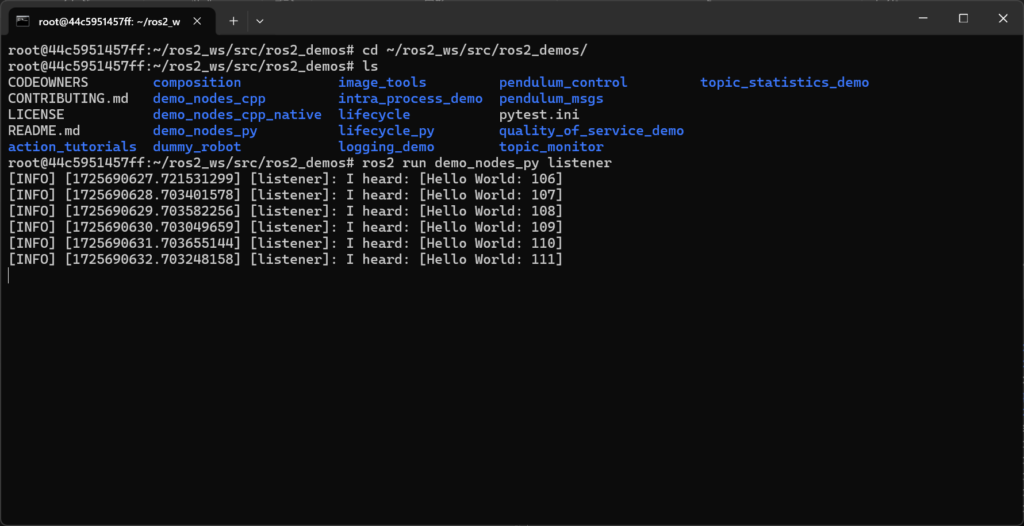
talker がメッセージを発信して、listener がメッセージを受信しています。
公式DOCのチュートリアル
ここから公式DOCのチュートリアルを進めていきます。
環境設定
ROS 2 コマンドにアクセスするには、次のように、開く新しいシェルごとにこのコマンドを実行する必要があります。
source /opt/ros/jazzy/setup.bash新しいシェルを開くたびにセットアップ ファイルを読み込まなくても済むようにするには (タスク 1 をスキップ)、シェルの起動スクリプトに次のコマンドを追加します。
echo "source /opt/ros/jazzy/setup.bash" >> ~/.bashrcROS 2 セットアップ ファイルをソースすると、ROS 2 の操作に必要ないくつかの環境変数が設定されます。ROS 2 パッケージの検索や使用で問題が発生した場合は、次のコマンドを使用して環境が適切に設定されていることを確認してください。
printenv | grep -i ROSROS_DISTROやROS_VERSIONなどの変数が設定されていることを確認します。
ROS_VERSION=2
ROS_PYTHON_VERSION=3
... (略)
ROS_DISTRO=jazzy
ROS_DOMAIN_ID 変数を設定します。
ROS 2 ノードのグループに一意の整数を決定したら、次のコマンドで環境変数を設定できます。
export ROS_DOMAIN_ID=<your_domain_id>今回は、とりあえず「30」にしておきます。
export ROS_DOMAIN_ID=30シェル セッション間でこの設定を維持するには、シェルの起動スクリプトに次のコマンドを追加します。
echo "export ROS_DOMAIN_ID=30" >> ~/.bashrc初心者チュートリアル:turtlesim と ros2 rqt
Turtlesim は、ROS 2 を学習するための軽量シミュレーターです。ROS 2 の最も基本的な動作を説明し、後で実際のロボットやロボット シミュレーションで何を行うかのアイデアを提供します。
rqt は、ROS 2 用のグラフィカル ユーザー インターフェイス (GUI) ツールです。rqt で実行されるすべての操作はコマンド ラインで実行できますが、rqt は ROS 2 要素を操作するためのよりユーザーフレンドリーな方法を提供します。
このチュートリアルでは、ノード、トピック、サービスなどの ROS 2 のコア概念について触れます。これらの概念はすべて、後のチュートリアルで詳しく説明されます。今は、ツールを設定して、その使い方を体験するだけです。
turtlesim をインストールする
ROS 2 ディストリビューション用の turtlesim パッケージをインストールします。
apt update
apt install -y ros-jazzy-turtlesim
パッケージがインストールされていることを確認します。
ros2 pkg executables turtlesim上記のコマンドは、turtlesim の実行可能ファイルのリストを返します。
turtlesim draw_square
turtlesim mimic
turtlesim turtle_teleop_key
turtlesim turtlesim_node
turtlesim を起動する
turtlesim を起動するには、ターミナルで次のコマンドを入力します。
ros2 run turtlesim turtlesim_nodeシミュレーター ウィンドウが表示され、中央にランダムなカメが表示されます。
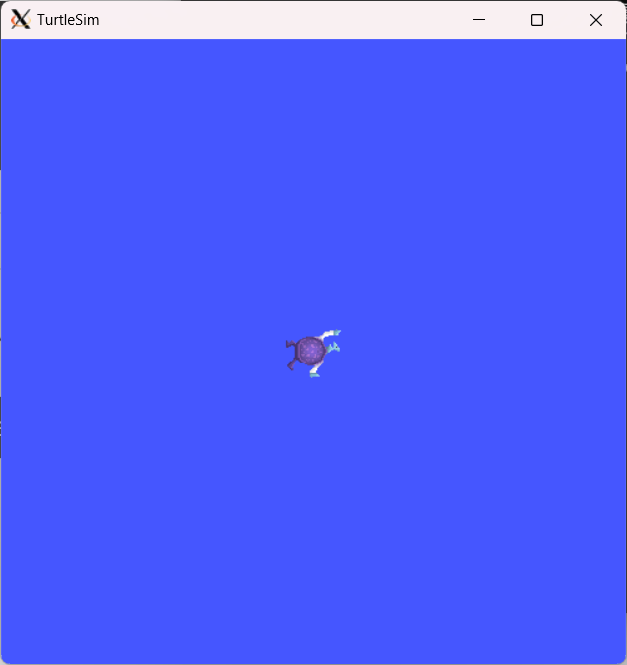
ターミナルのコマンドの下に、ノードからのメッセージが表示されます。
[INFO] [1725725172.134421847] [turtlesim]: Starting turtlesim with node name /turtlesim
[INFO] [1725725172.153241441] [turtlesim]: Spawning turtle [turtle1] at x=[5.544445], y=[5.544445], theta=[0.000000]
そこには、デフォルトのタートルの名前と、それが出現する座標が表示されます。
turtlesim を使ってみる
新しいターミナルを開き、ROS 2を再度ソースします。
ここで、最初のノードのタートルを制御するための新しいノードを実行します。
ros2 run turtlesim turtle_teleop_key Reading from keyboard
---------------------------
Use arrow keys to move the turtle.
Use g|b|v|c|d|e|r|t keys to rotate to absolute orientations. 'f' to cancel a rotation.
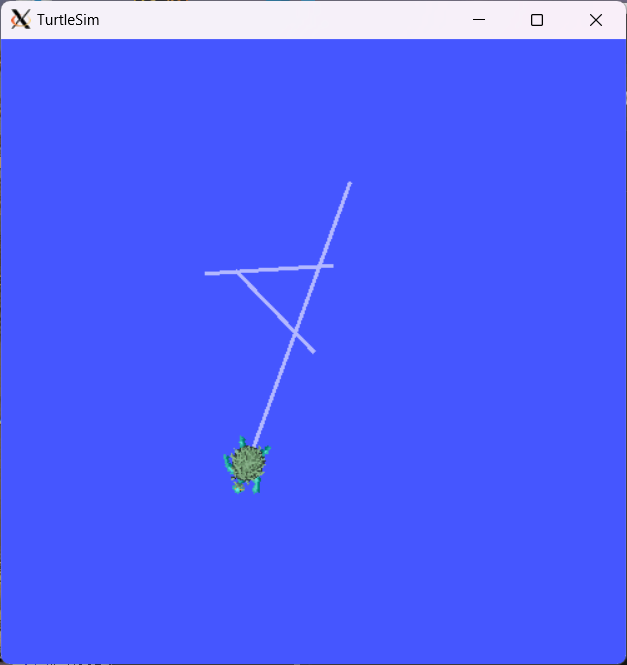
'q' to quit.キーボードの矢印キーを使用してカメを操作します。カメは画面上を移動し、付属の「ペン」を使用して、これまでたどってきた経路を描きます。
list のそれぞれのコマンドのサブコマンドを使用して、ノードとそれに関連付けられたトピック、サービス、アクションを表示できます。
ros2 node list
ros2 topic list
ros2 service list
ros2 action list
以上です。


コメント
Hello! I hope you’re having a great day. Good luck 🙂
I beloved as much as you’ll receive carried out right here. The sketch is tasteful, your authored material stylish. nevertheless, you command get got an impatience over that you would like be handing over the following. ill no doubt come further in the past again as precisely the same nearly very regularly within case you shield this hike.
thank you.